36
Lecture 5 - Create queries
What's a query?
A query is a way to get specific information from the database.
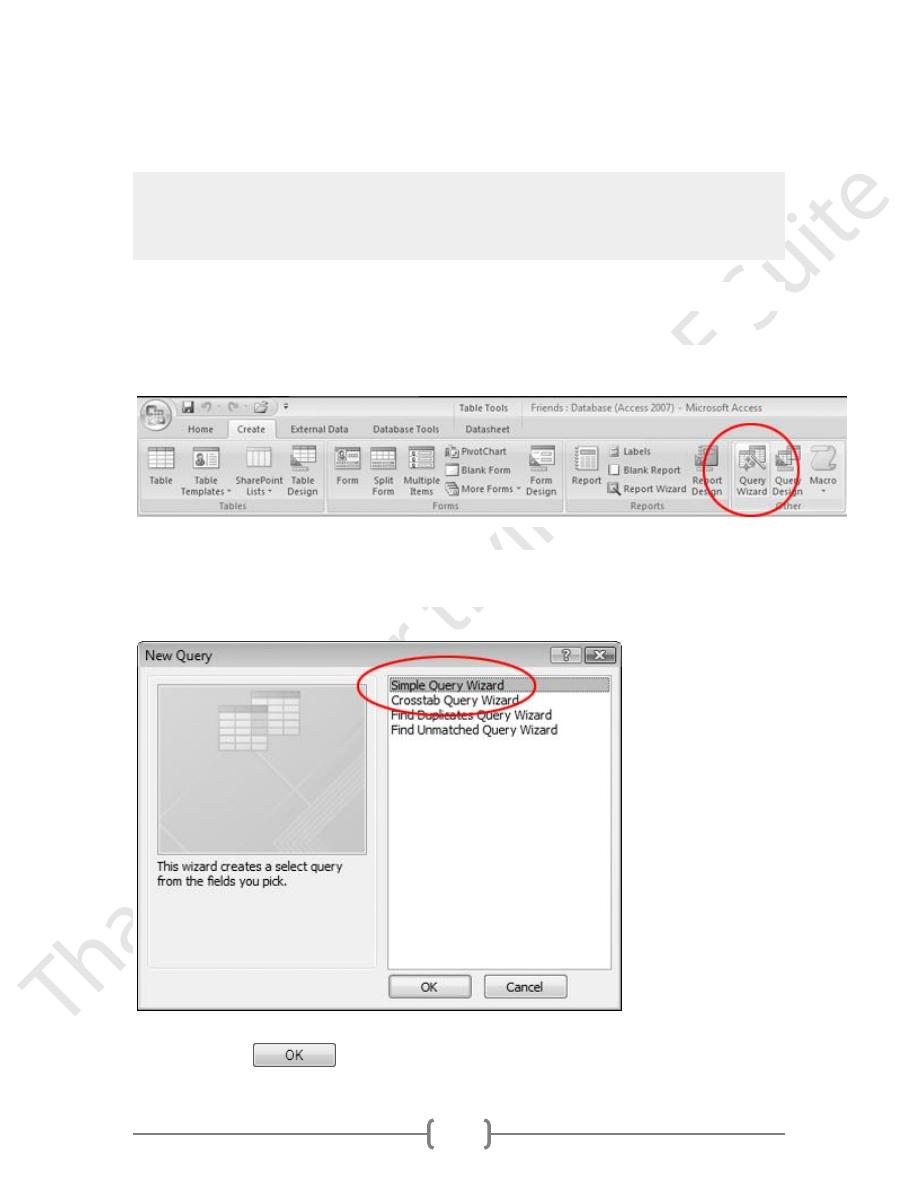
1. Click the Create tab.
In the Ribbon, click Query Wizard.
2. When the New Query window appears, make sure Simple Query Wizard is
selected.
Then click the
button.
37
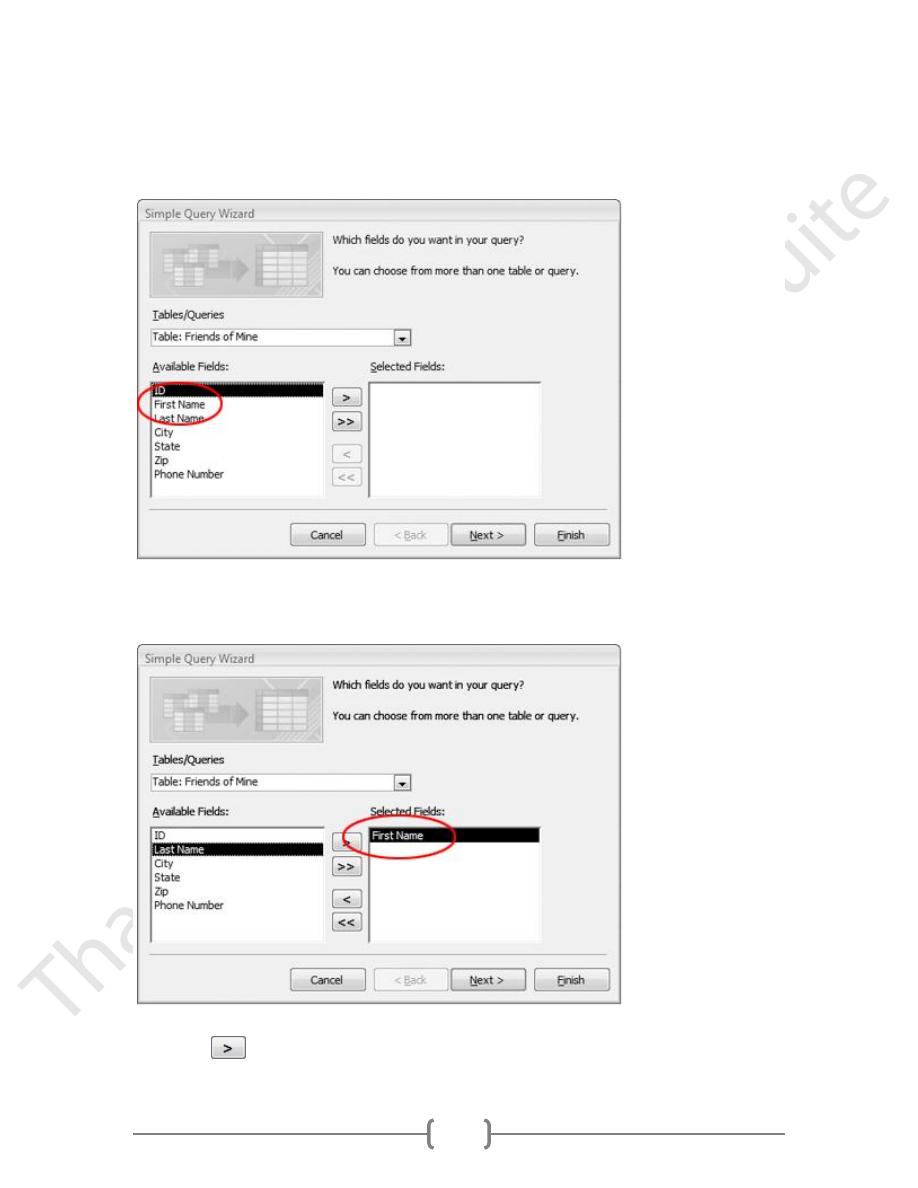
3.
When the Simple Query Wizard opens, double-click First Name in the
Available Fields list.
First Name should appear in the Selected Fields column:
4. Click the
button.
38
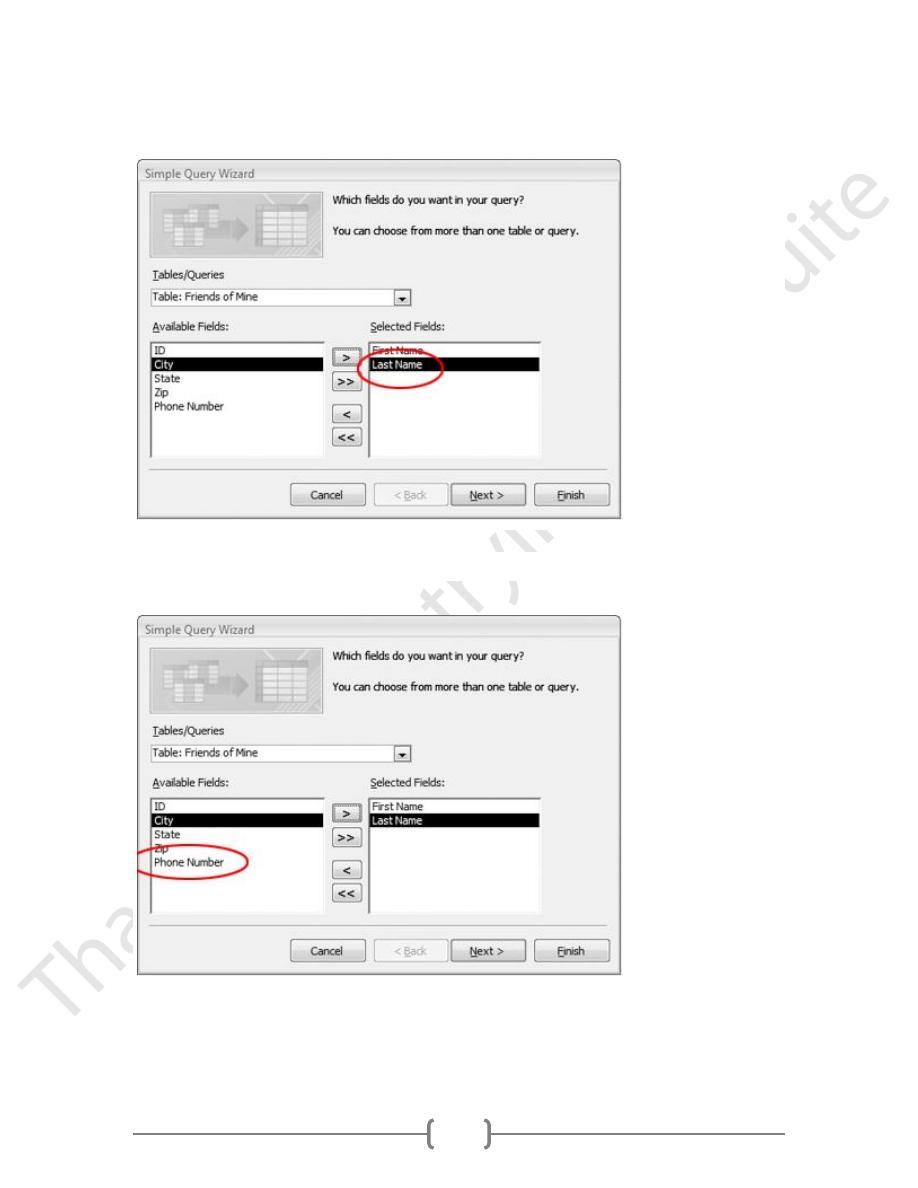
This should add the Last Name field to the Selected Fields list:
5. Double-click Phone Number.
This should add the Phone Number field to the Selected Fields list:
39
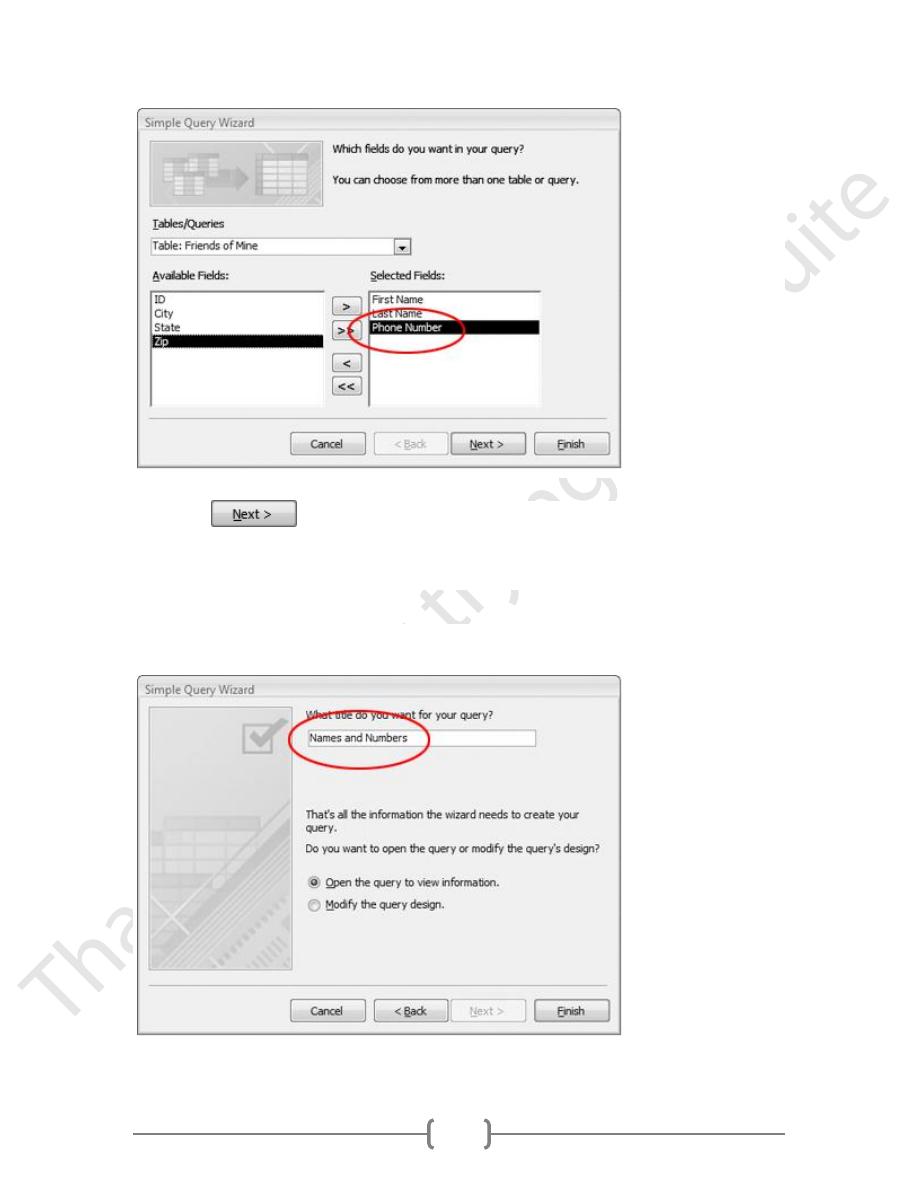
6.
Click the
button.
7. When the final screen appears, type:
Names and Numbers

40
8.
Click the
button.
The query is automatically saved and executed.
It should look like this:
Essentially, it's a question. You use queries to ask the database things like, "Who
are my patients in basra?", or "How many pipe fittings have I sold this month?"
1.
Start Access, then open the FoodStore1 database.
2.
Click the Create tab.
In the Ribbon, click Query Design.
The query Design View window should appear:
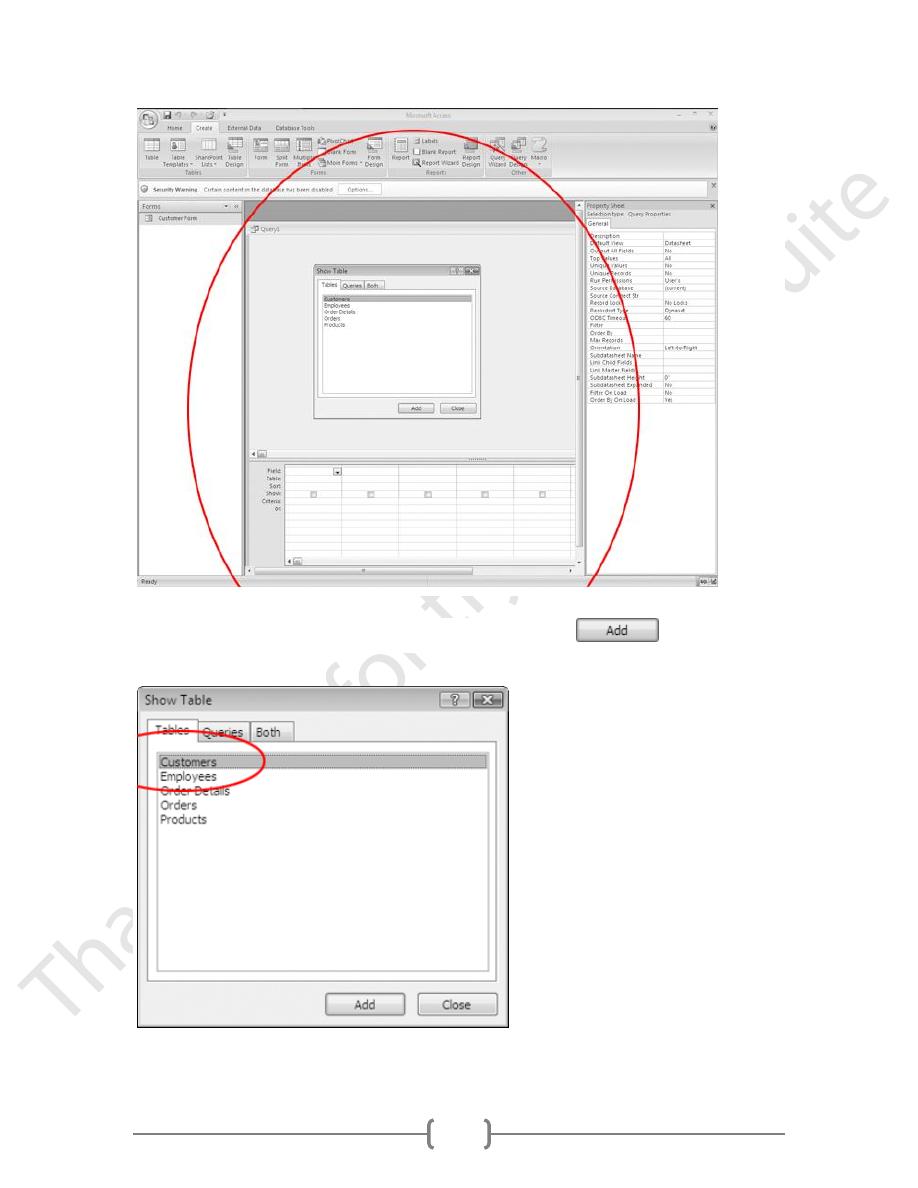
41
3. In the Show Table window, click Customers, then click the
button.
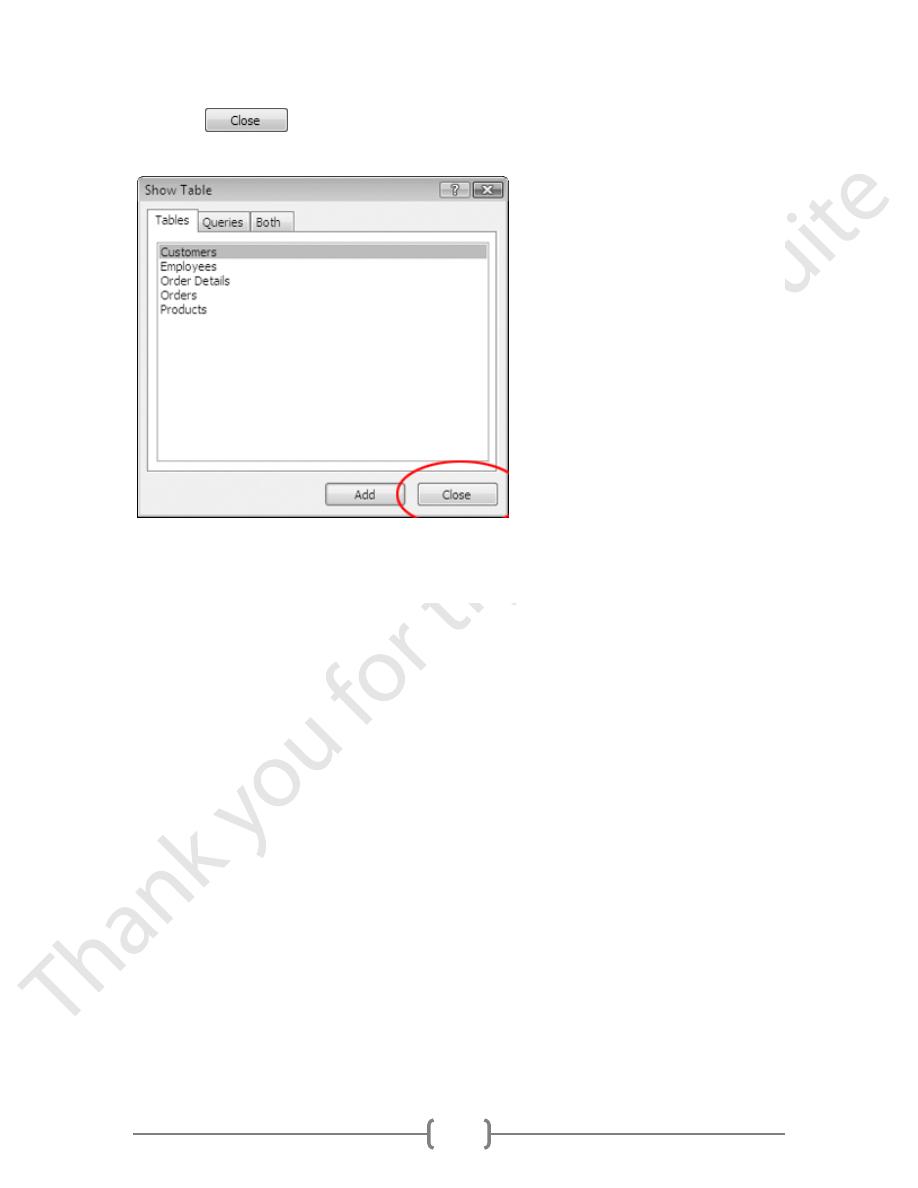
42
4. Click the
button.
This adds the Customers table to the query.
The query window should look like this:
43
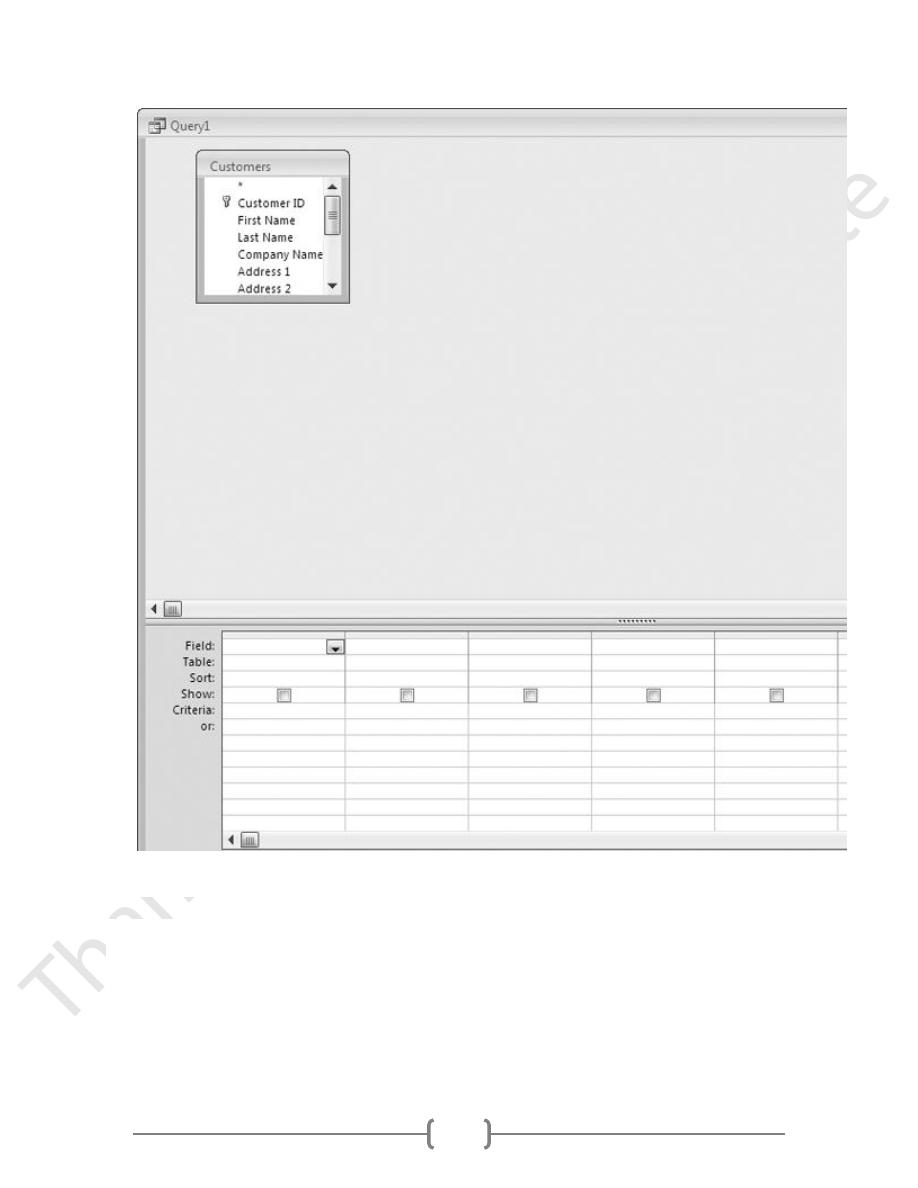
Add fields to query
1. Drag the
Customer ID
field from the
Customers
table to the first column of the
query design grid.
44
Release the mouse button.
The query design grid should look like this:

45
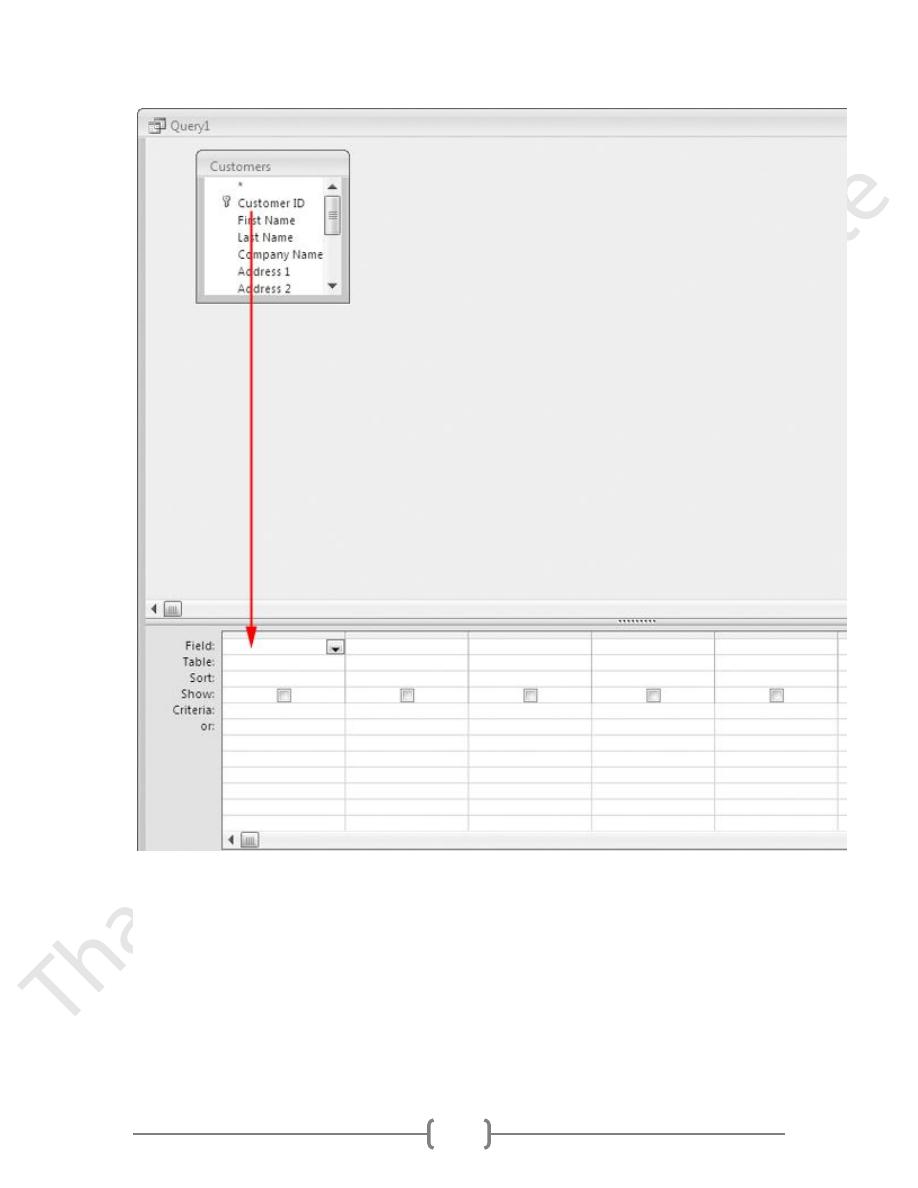
2. Drag the First Name field and Last Name field to the design grid the same way.
The design grid should look like this:
The query is now set up to show the Customer ID, First Name, and Last Name of each
customer in the Customers table.
Run the query
1. In the Ribbon, click
Run
.

46
The query window should now look like this:
The query shows the Customer ID, First Name, and Last Name of each customer
in the Customers table:
SORT RESULTS
1. In the Ribbon, click View, then Design View.
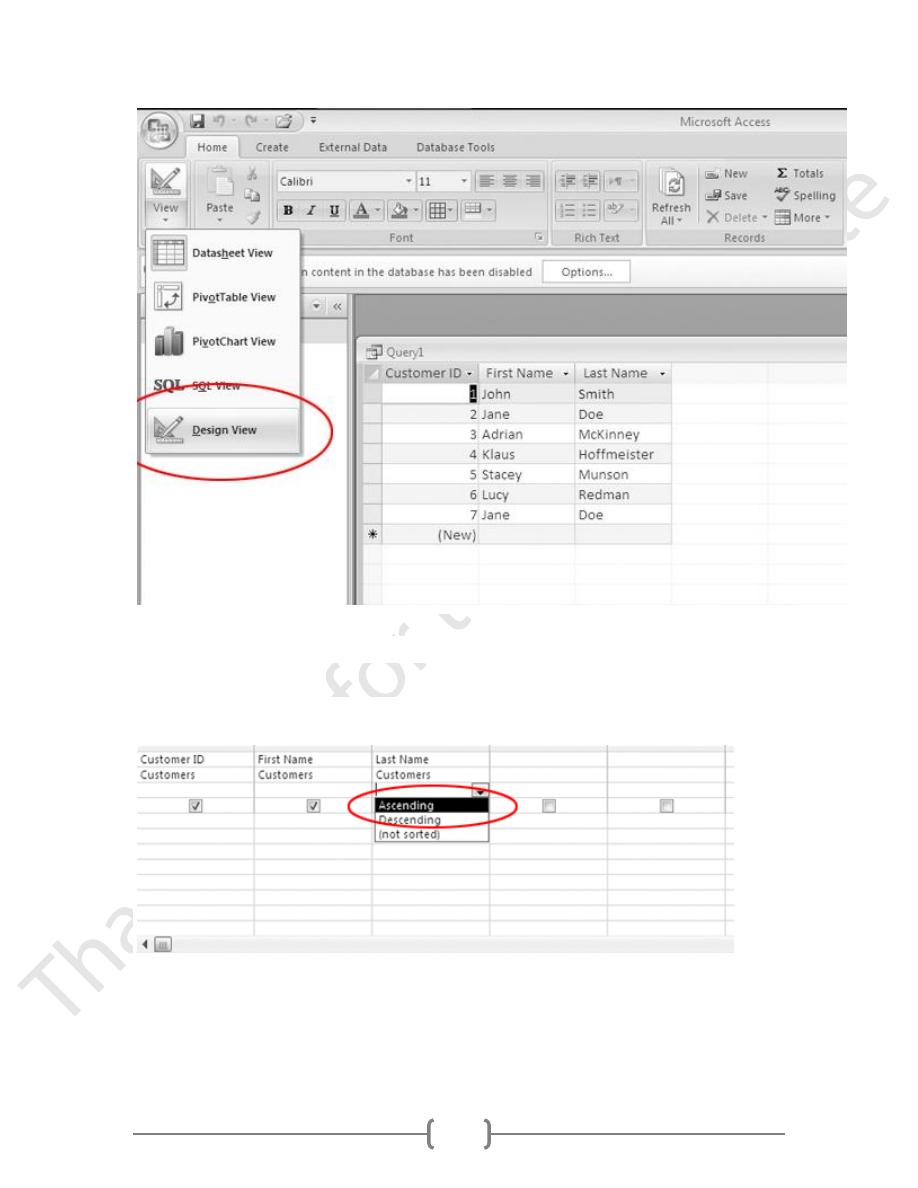
47
2. In the Last Name field, click in the Sort row.
When the drop-down arrow appears, click it, then click Ascending.
3. In the Ribbon, click Run.
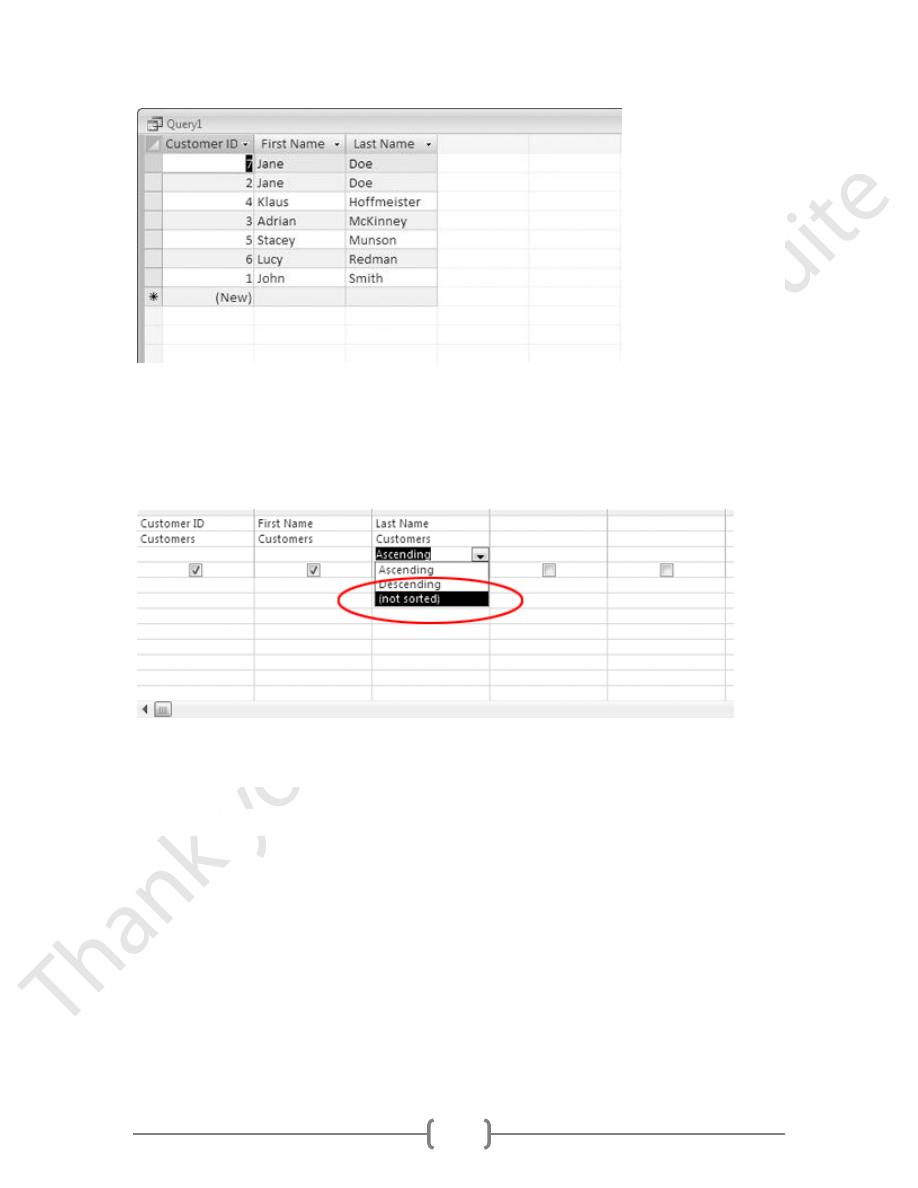
The query should run, and sort the records alphabetically by Last Name:
48
4.
In the Ribbon, click View, then Design View
5.
In the Customer Last Name field, click in the Sort row, then click (not sorted).
ADD CRITERIA
1. In the query's Customer table, scroll down to the State field.
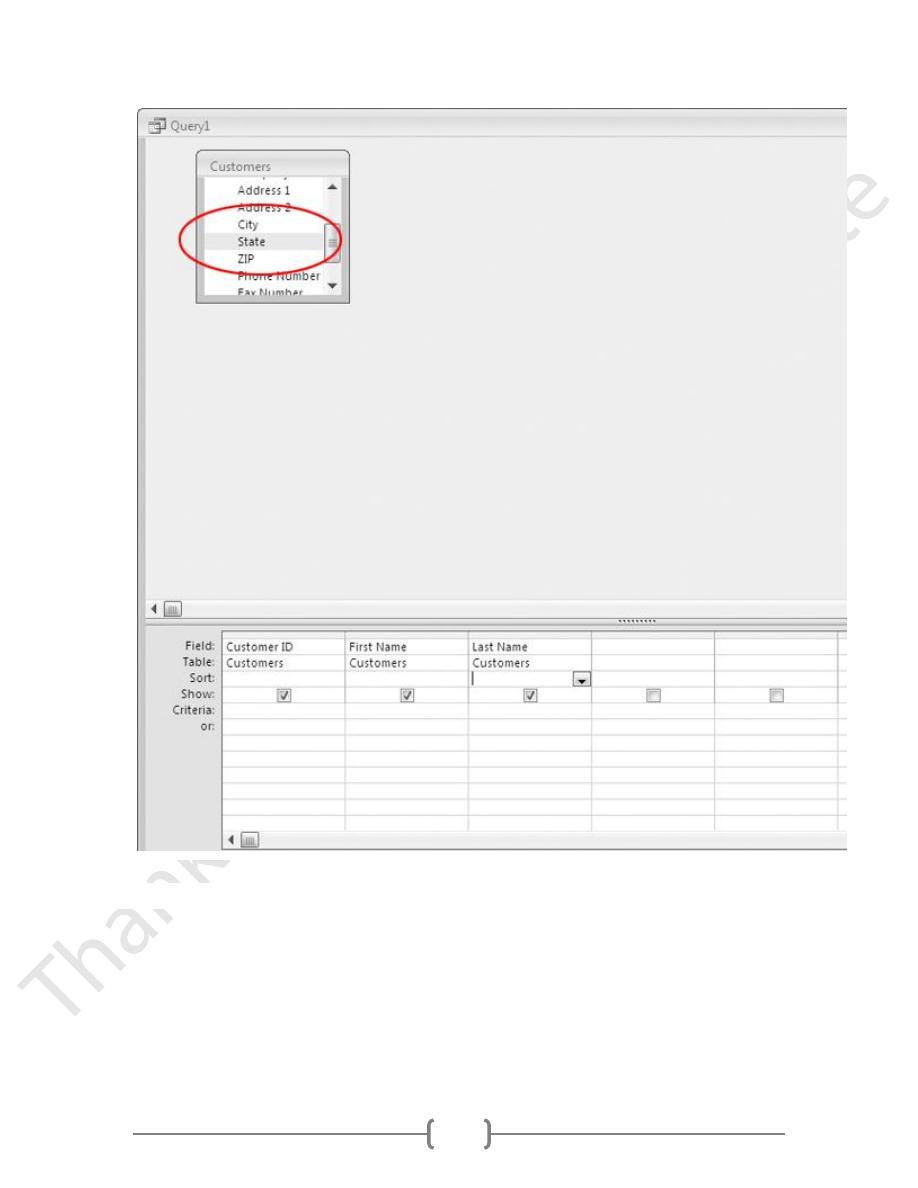
49
2. Add the State field to the query design grid.
50
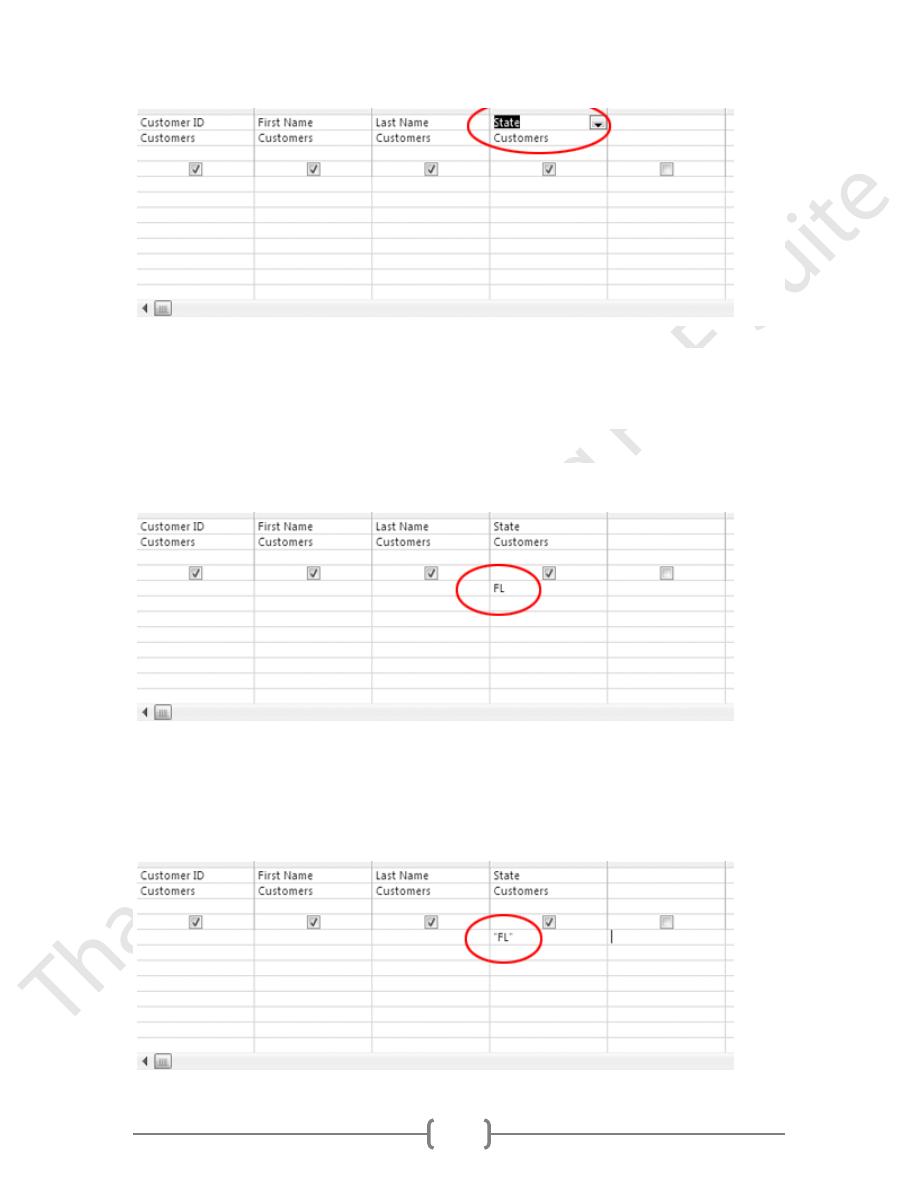
3.
In the State field, click in the Criteria row.
4. Type:
FL
5.
Press the ENTER key.
It should look like this:
51
TIP: Notice that Access automatically surrounded the FL criterion with double quotes.
That's because the State field stores text data. In database query language, double
quotes signify a string of text.
If this field held date data, Access would have surrounded it with hash marks (#).
If the field stored number data, Access wouldn't have added anything.
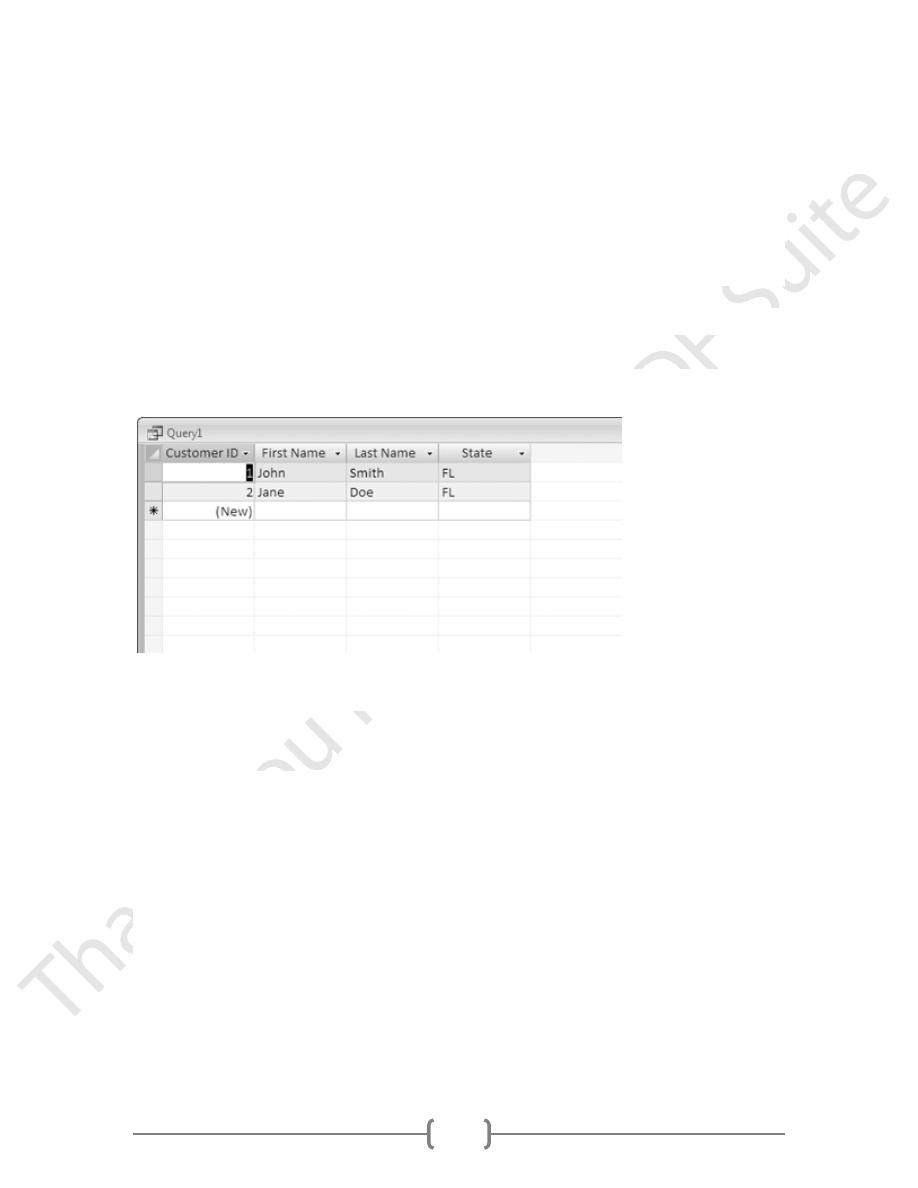
6. In the Ribbon, click Run.
The query results should look like this:
It has returned all customers who live in the State of FL.