41
When you edit a document in Word, what you see on your computer screen looks almost exactly like the
final printed page. To get that correct preview, Word needs to know some details about the paper you're
using, like the page size and orientation. You have two different ways to change the page settings: using the
Page Layout tab (Figure 1) or the Page Setup dialog box (Figure 2). When you click the Page Layout tab, the
ribbon's buttons and icons change to show you options related to designing your page as a whole. Your
options are organized in five groups: Themes, Page Setup, Page Background, Paragraph, and Arrange.
UP TO SPEED
Of Menus and Boxes
Word gives you two ways to set options: through ribbon menus and dialog boxes. In general, the
ribbon's drop-down menus give you access to quick, predesigned solutions, while dialog boxes
give you greater control over more details. Menu options usually focus on one or two settings,
while dialog boxes are much more complex affairs, letting you change several settings at once.
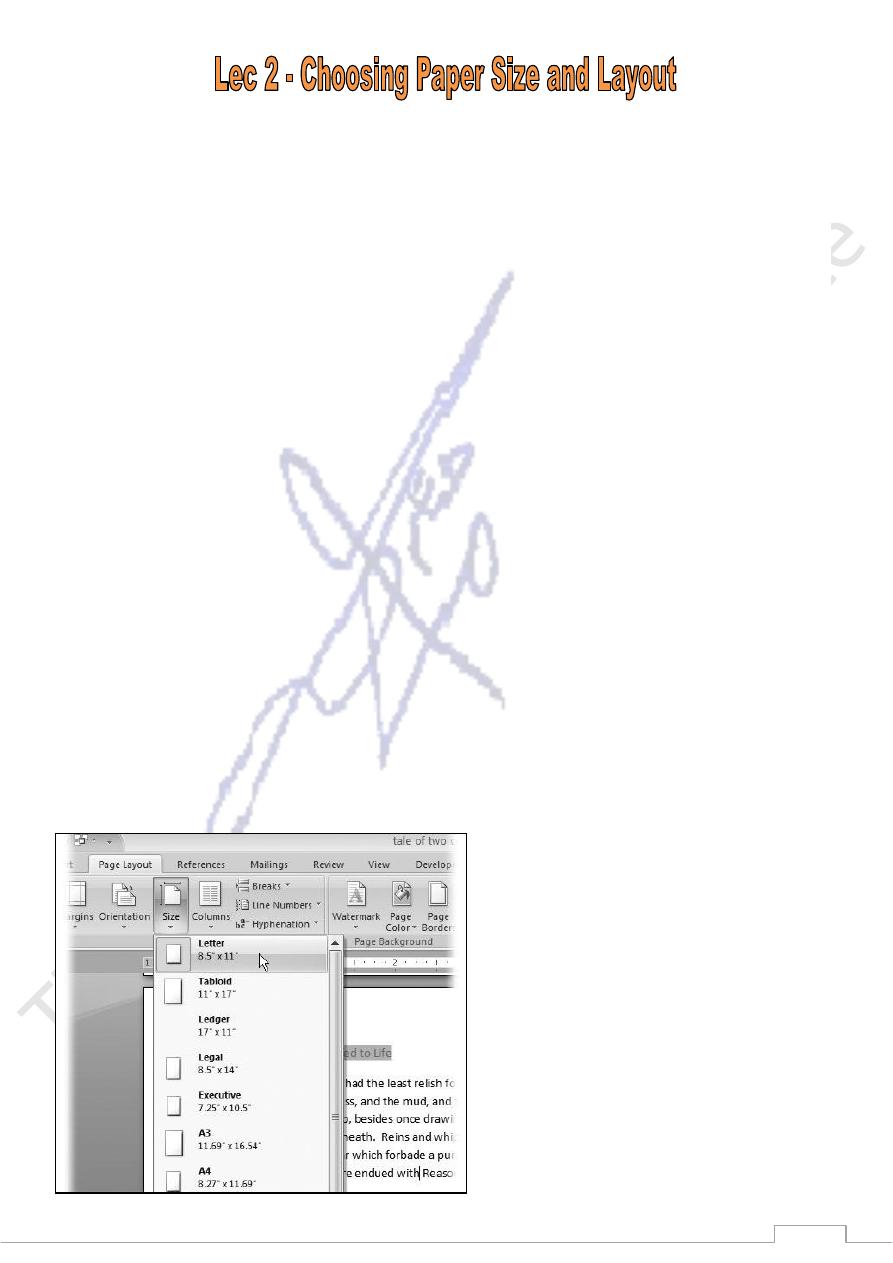
The Page Layout
→
Page Setup
→
Size menu, shown in Figure 1, lets you choose a standard paper
size with one click. But what if you're not using one of the standard paper sizes on the Size
menu? In that case, click More Paper Sizes (at the bottom of the Size menu).
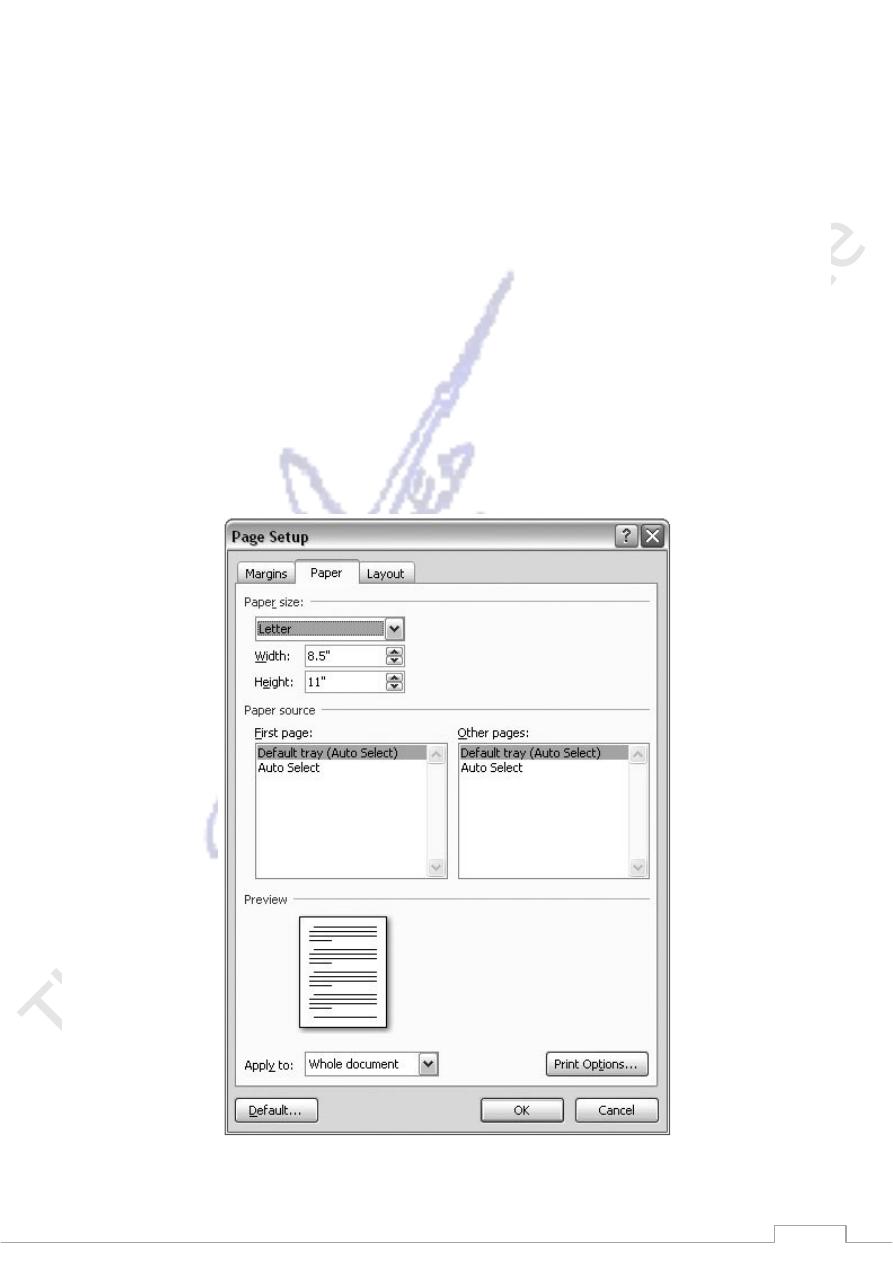
The Page Setup dialog box opens to the Paper tab (Figure 2). Here, you can customize the page
size by entering numbers in the Width and Height text boxes and tweak other paper-related
settings. These other settings, such as the Paper Source settings (which let you tell your printer
which tray to take the paper from), are typical of the fine-tuning controls you find in dialog
boxes.
Changing Paper Size
If you want to quickly change the page size to a standard paper size like letter, legal, or tabloid, the Page
Layout
→
Page Setup
→
Size menu is the way to go (Figure 1). With one quick click, you change your
document's size. If there's text in your document, Word reshapes it to fit the page. Say you change a 10-page
document from letter size to the longer legal-size page. Word spreads out your text over the extra space, and
you'll have fewer pages overall.
(Figure 1) Page Layout
42
Customizing paper size and source
If you can't find the paper size you need on the Size menu, then you need to customize your paper size,
which you do in the Page Setup dialog box's Paper tab. Here are the steps:
1. Choose Page Layout →Page Setup →Size. At the bottom of the Size menu, click More Paper Sizes.
The Page Setup dialog box appears, with the Paper tab showing (Figure 2). Why the Paper tab?
Because you opened the box using the More Paper Sizes button.
2. In the Width and Height boxes, enter the size of your custom paper.
The quickest way to change the Width and Height settings is to select the numbers in the boxes and
type your new page dimensions. Your new numbers replace the previous settings. You can also click
the up and down arrows to the right of the text boxes, but it's slow going as the sizes change in tenths
of an inch. Notice that as you change the dimensions, the Preview image at the bottom of the Page
Setup box changes to match.
3. Click OK at the bottom, to close the dialog box and make the changes.
The Page Setup box closes, and your custom-sized document shows in Word.
(Figure 2) Page Setup dialog box.
43
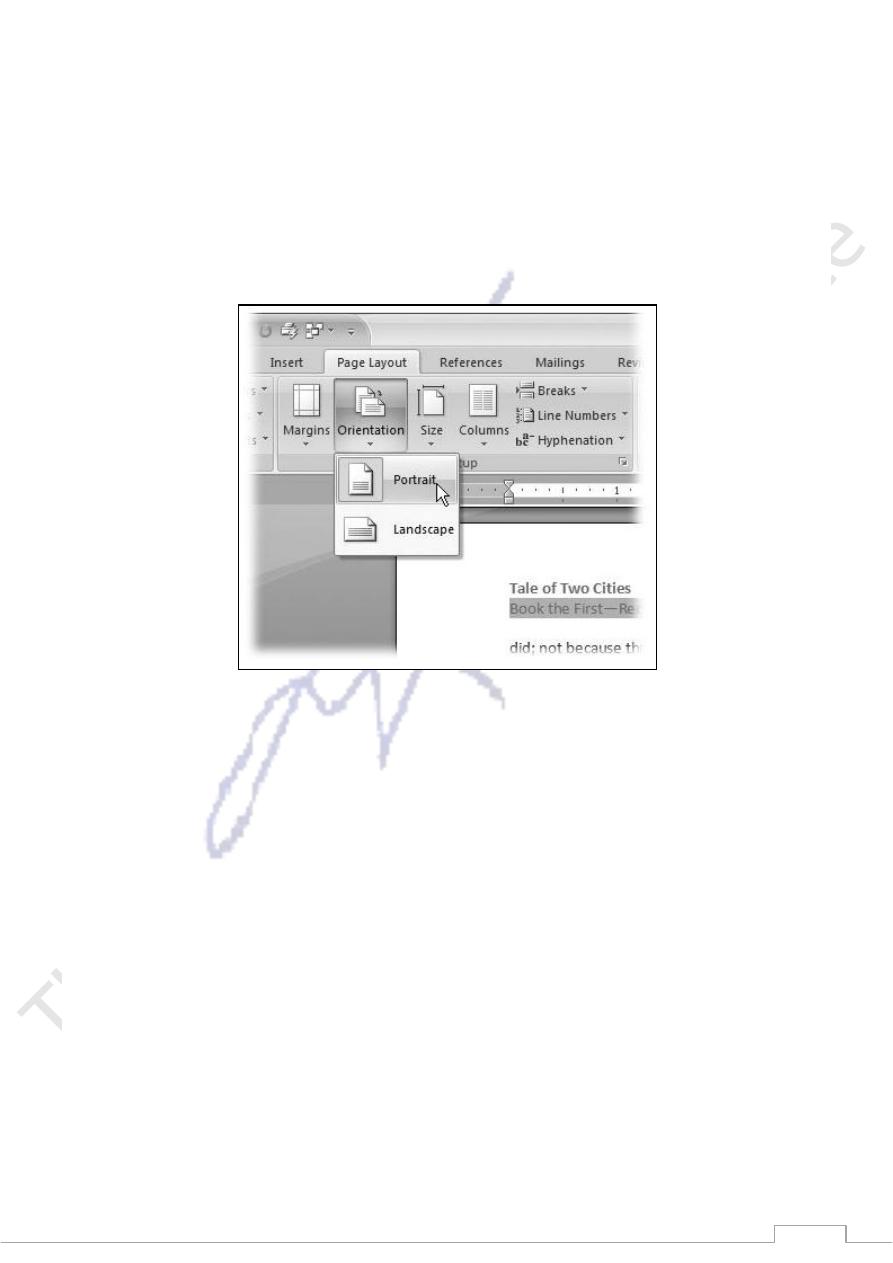
Setting Paper Orientation
Most business documents, school papers, and letters use a portrait page orientation, meaning the page is
taller than it is wide. But sometimes you want a short, wide page landscape page orientation to
accommodate a table, chart, or photo, or just for artistic effect. Whatever the reason, using the Orientation
menu (Page Layout →Page Setup
Orientation) is the easiest way to make the change (Figure 3). Just
click one of the two options: Portrait or Landscape.
If you've already got the Page Setup box open, you'll find the Orientation options on the Margins tab (Page
Layout →Page Setup →Margins →Custom Margins).
3.2. Setting Document Margins
Page margins are more than just empty space. The right page margins make your document more readable.
Generous page margins make text look inviting and give reviewers room for notes and comments. With
narrower margins, you can squeeze more words on the page; however, having too many words per line
makes your document difficult to read. With really long lines it's a challenge for readers to track from the
end of one line back to the beginning of the next. Margins become even more important for complex
documents, such as books or magazines with facing pages. With Word's margins and page setup tools, you
can tackle a whole range of projects.
Selecting Preset Margins
Word's Margins menu (Page Layout →Page Setup →Margins) gives you a way to quickly apply standard
margins to your pages. The preset margins are a mixed bag of settings from a half inch to one and a quarter
inches. For most documents, you can choose one of these preset margins and never look back (Figure 4).

44
(
Figure 4).
For each of the preset margin options you see dimensions and an icon that hints at the look of the page.
Normal gives you one inch on all sides of the page.
Narrow margins work well with multicolumn documents, giving you a little more room for each
column.
Moderate margins with three-quarter inches left and right let you squeeze a few more words in each
line.
The Wide preset gives you more room for marginal notes when you're proofing a manuscript.
To select one of the preset margins, go to Page Layout →Page Setup →Margins, and then click one of the
options. You can also use the shortcut key Alt +P, M, and then use your up and down arrow keys to
highlight one of the margins. Press Enter to use the highlighted margin.
Setting Custom Margins
What if none of the preset margins on the menu suits your needs? Say your company's style guide insists on
one-and-a-half-inch margins for all press releases. Here's how to customize your margins:
1. Go to Page Layout
→
Page Setup
→
Margins
→
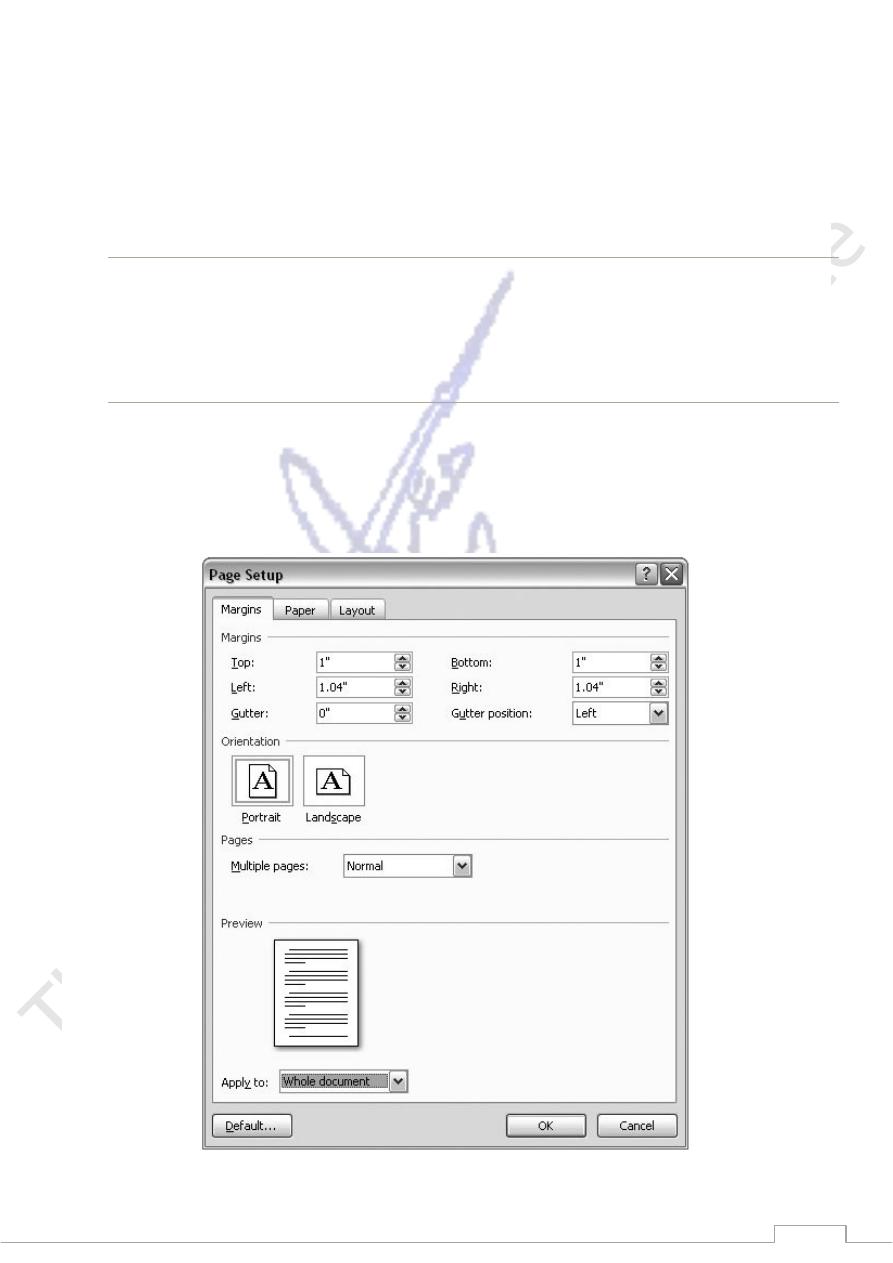
Custom Margins to open the Page Setup box to the
Margins tab (Figure 5).
45
The Page Setup box has three tabs at the top. The Margins tab is on the left.
2. At the top of the box, enter dimensions for top, bottom, left, and right margins.
The boxes in the Margins section already contain your document's current settings. To change the
Top margin to one and a half inches, select the current setting, and then type 1.5, or you can click the
arrows on the right side of the box to change the margin number. Make the same change in the
Bottom, Left, and Right margin text boxes.
Tip: While you're here in the Page Setup box, double-check the page Orientation setting. Margins
and page orientation have a combined effect. In other words, if you want a quarter-inch top margin,
make sure the orientation is set correctly depending on whether you want the "top" of the page to be
on the long side or the short side of the paper.
3. Click OK to apply the changes to your document.
The Page Setup box closes and your document takes shape with the new margins. If the changes are
substantially different from the previous settings, you may find that you have a different number of
pages in your document.
(Figure 5).
46
3.3. Adding Page Background Features
While every document has a paper size, orientation, and margins, Word has some specialized formatting
features that you'll use less frequently. You'll find the options for watermarks, page color, and borders in the
middle of the Page Layout tab. These tools let you get a little fancy.
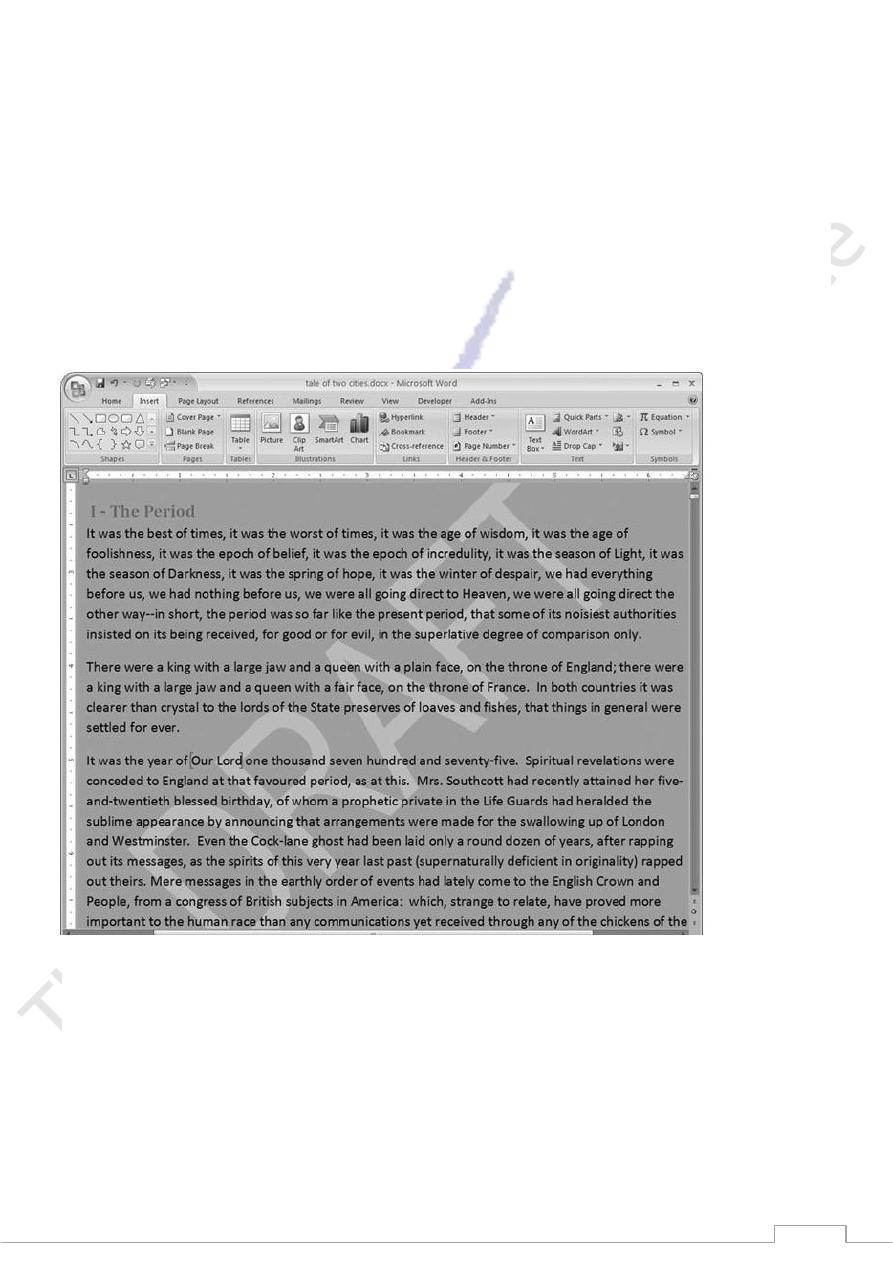
Adding Watermarks
A true watermark is created in a process where a water-coated metal stamp imprints a design into the paper's
surface during manufacture. The design is usually a paper company's logo. The presence of a watermark can
also indicate a document's authenticity. Word can't create a real watermark, but it can replicate the effect by
printing one faintly on the page, seemingly beneath the text (Figure 6). A watermark could be your company
logo, or it could be words like CONFIDENTIAL, DRAFT, or DO NOT COPY, emblazoned diagonally
across the page.
(Figure 6).
Suppose you'd like to have your company logo appear as a classy watermark on your document. Using your
logo picture file as a watermark takes just a few steps:
1. Go to Page Layout →Page Background →Watermark.
When the Watermark menu drops down, you see a dozen predesigned watermark options. You can
choose one of these options, or you can take a few more steps to customize your watermark.
2. At the bottom of the menu, click Custom Watermarks to open the Printed Watermark dialog box
(Figure 7).
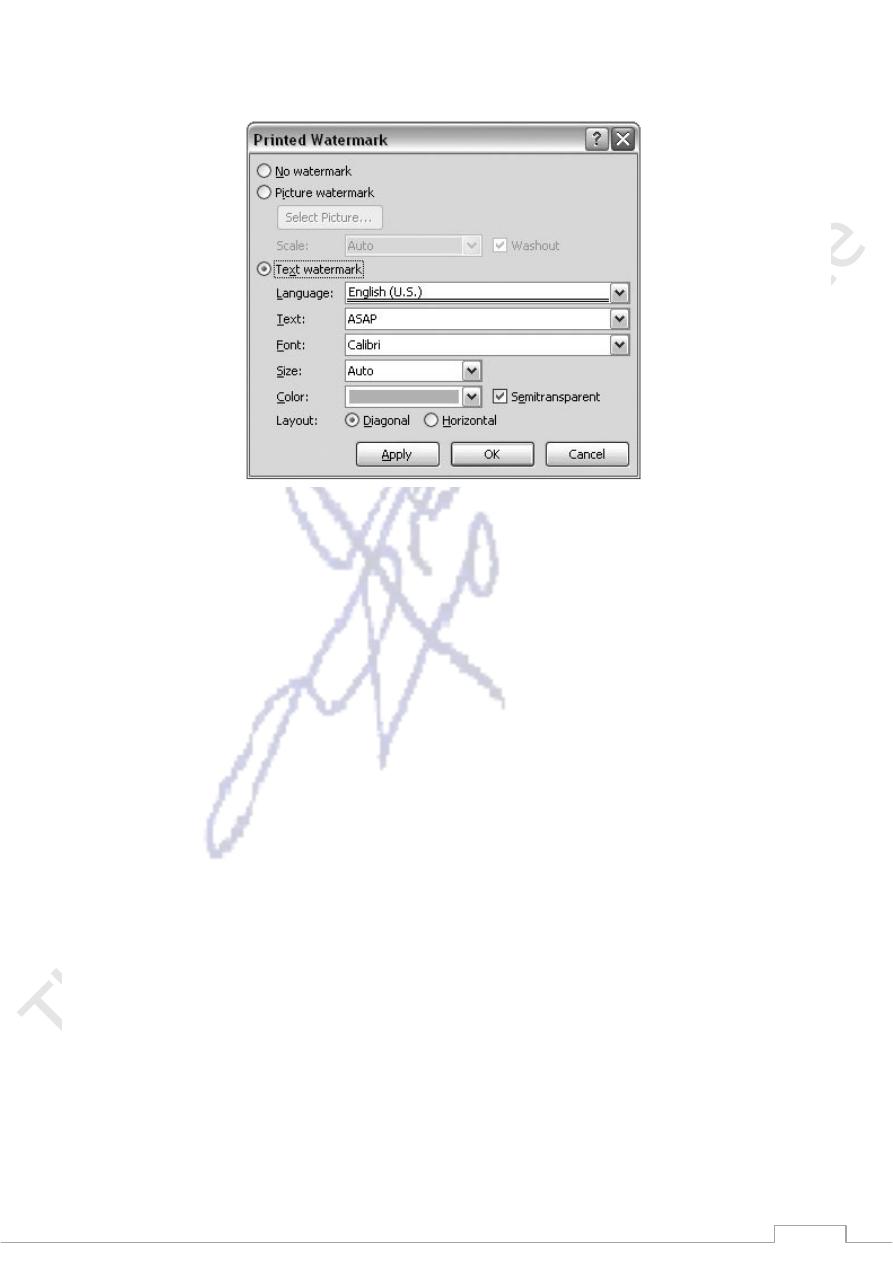
47
The Printed Watermark box has three radio button options arranged vertically: No watermark,
Picture watermark, and Text watermark.
(Figure 7) Watermark dialog box.
3. Select the "Picture watermark" radio button.
When you click one of these buttons, the appropriate fine-tuning options become available and the
others fade to gray. For example, when you choose "Picture watermark," the Text watermark options
are grayed out.
4. Click the Select Picture button to open the Insert Picture box.
The Insert Picture box is a standard Windows file box. Use the buttons on the left and the "Look in"
drop-down menu at the top to navigate to the folder with your logo's picture file.
5. Double-click the picture file to use it for your watermark, or, as an alternative, select your picture,
and then click Insert.
The Insert Picture box closes, and you see the More Watermarks box again. Next to the Select
Picture button, you see the name of your picture file.
6. Set the Scale and Washout options.
Now that you've chosen your picture file, you can use two more settings to make your watermark
look spiffy. Use the Scale drop-down menu to adjust the size of your image so that it looks good on
the page. You can choose from preset sizes of 50%, 100%, 150%, 200%, or 500%. Or you can
choose the Auto setting, which scales your image to fit comfortably on the page. The Washout
checkbox fades your image, making it easier to read text over the watermark.
7. Click Apply to see your watermark in action, and then click Close to finish up.
Use the Apply button to see how your watermark will look on the printed page. If you need a better
view, click the top bar of the Printed Watermark box, and then drag it out of the way. When you're

48
happy with the results, click Close to close the Printed Watermark dialog box. Your new watermark
appears on every page of your document. To back out of the deal, select "No watermark" at the top
of the box.
Tip: To get rid of an existing watermark, open the Watermark drop-down menu and, at the bottom, click
Remove Watermark.
Choosing a Page Color
The Page Color option applies more to Web pages than to printed pages. When you're working with paper,
you'll usually print on a different colored paper rather than printing a colored background on white paper.
However, with heavy stock, you can use this feature on occasion to create postcards, colored covers, and so
on.
Go to Page Layout →Page Background →Page Color drop-down menu to see a palette of options (Figure
8). If you move your mouse over a color (without clicking), then you see the page change color,
immediately giving you a preview. In fact, if you're previewing a very dark page color, Word's smart enough
to change the text from black to white. That doesn't mean it's impossible to come up with some garish page
color options. Click a color to set your page color.
(Figure 8).
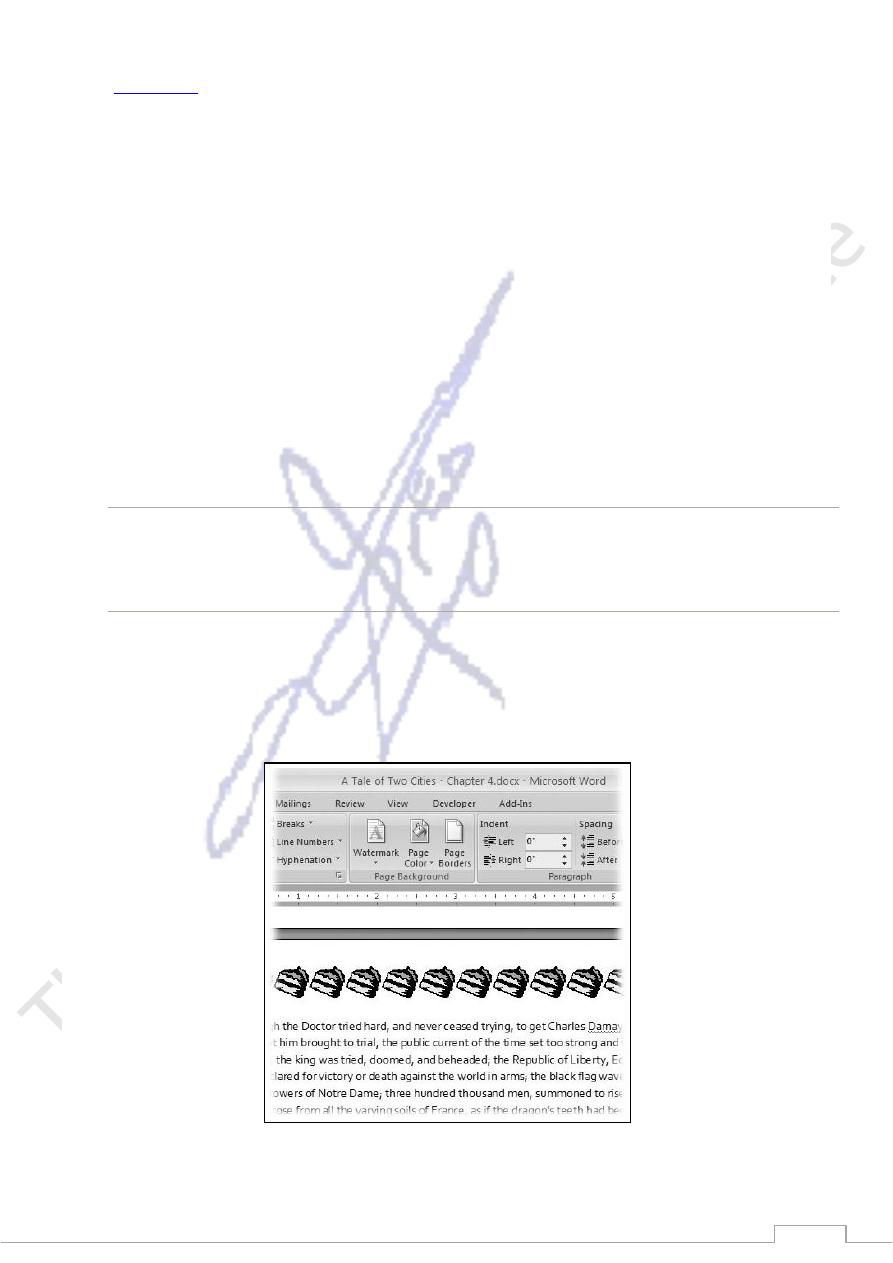
Applying Page Borders
A tasteful, properly applied border can add a certain flare to your document. However, an inappropriate
border can make your document look cheesy (
Figure 3-10
). Enough said.
Okay, now that you've been warned, here's how to add page borders:
49
1. Choose Page Layout →Page Background →Page Borders to open the Borders and Shading box
(
Figure 3-11
).
The Borders and Shading box has three tabs. Make sure you're using the Page Border tab. (The first
Borders tab puts borders around paragraphs, pictures, and other objects on the page.)
2. On the left, choose a setting to define the border.
Start with the five settings on the left, to define the border in broad strokes ranging from no border to
drop shadows. You can select only one of these settings.
3. Choose a line style, color, and width, or choose an art border.
Decide whether your border will be a line or an art bordertrees, hearts, pieces of cake, and so on. If
you're going with a line border, choose a style of line from the drop-down menu. You can choose
from more than two dozen lines, including solid, dotted, double, and wavy. Then use the drop-down
menus to choose a line color and width.
1. If you want an art border, select your design from the menu. Note that some of the art styles use
different patterns for different sides of the page and for the corner design.
Note: Whether you choose lines or art for your border, you can adjust the width. You can increase
line widths to a thick 6 points and art widths to 31 points.
2. Preview the border, and then select the sides of the page that will have borders.
The Preview on the right side of the Borders and Shading box shows what sides of your page will
have borders. Click the borders to toggle them on or off. Using this technique, you can choose to
show a border on a single side of the page or on any combination of sides.