77
After you've put together your slideshow created slides, added text and graphics, and so onyou have to give
PowerPoint a few instructions on how it should display the slideshow when it's show time. Say you're
creating a slideshow that you want to run continuously on a kiosk, with no human intervention. You might
want to tell to linger a few seconds longer on certain slides than on others. Or imagine that you have two
monitors hooked up to your computer: one set into the wall of a conference room, and one on a laptop
placed strategically where only you can see it. You can have PowerPoint display the slideshow on the wall
monitor, and the speaker notes on the laptop.
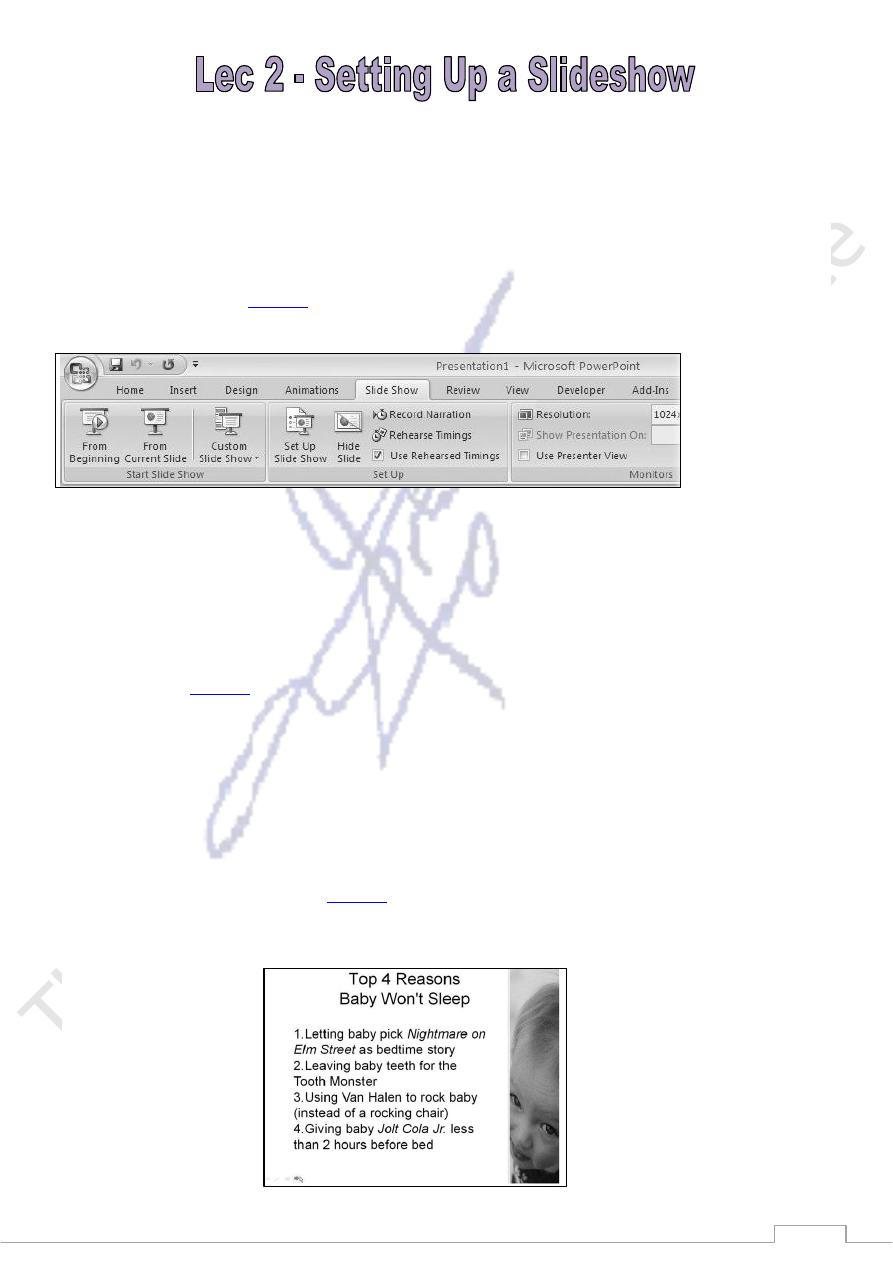
Using the Slide Show tab (
Figure 1
), you can set these options and more. The following sections show you
how.
Choosing a Slideshow Mode
The first thing to do when you're setting up your slideshow is to decide which mode you want your
slideshow to run in: full-screen, browser, or kiosk. Your choice affects the way folks can interact with your
slideshow while it's running, as well as which other options you can set.
Full-screen mode
Full-screen mode (
Figure 2
) is the way to go if you'll be the one giving your presentation. As the name
implies, in full-screen mode slideshows take up the entire screen. Depending on the PowerPoint options
you've set, ghosted controls appear in the lower-left corner of a full-screen slideshow. Other ways you can
interact with a full-screen slideshow running include keyboard shortcuts and a right-click menu .
The program assumes you want full-screen mode unless you tell it different. But if you (or a coworker) has
set your slideshow to another mode and you want to set it back, here's how:
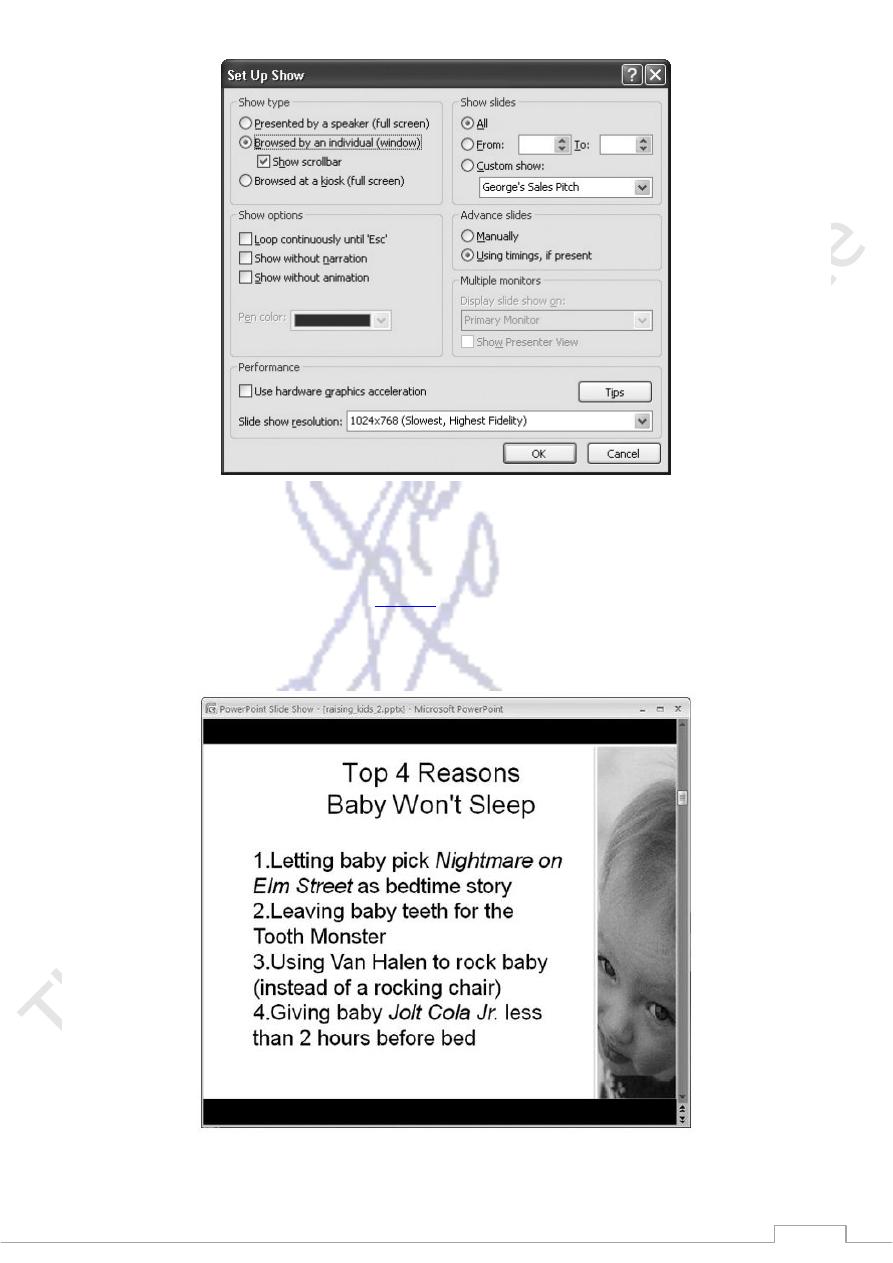
1. Choose Slide Show →Set Up →Set Up Slide Show.
The Set Up Show dialog box (
Figure 3
) appears.
2. Turn on the radio button next to "Presented by a speaker (full screen)."
Figure 2
78
Figure 3
Browser mode
When you set up a slideshow to run in browser mode, your slides don't take over the entire screen; instead,
they appear in a self-contained window (see
Figure 4
). A specialized right-click menu appears ,offering
choices that folks running your presentation might find handy printing your slides, for example. Designed to
be relatively easy for non-PowerPoint folks to figure out how to run, browser mode is an option for
slideshows you're planning to distribute by CD or email.
Figure 4

79
To set up your slideshow to run in browser mode:
1. Choose Slide Show →Set Up →Set Up Slide Show.
The Set Up Show dialog box appears.
2. Turn on the radio button next to "Browsed by an individual (window)."
3. For your audience's sake, also make sure the Show Scrollbar checkbox, which now becomes
available, is turned on.
If you leave this option turned off, your audience won't see an obvious way to scroll through your
slides. They must either know to right-click (which displays a menu of options) or sit there
frustrated.
Kiosk mode
If you're planning to let your slideshow run unattended, kiosk mode is what you want. In kiosk mode, there
are no ghosted controls or right-click menus which means there's nothing built-in that your audience can
click to start your slideshow, stop it, hop from one slide to the next, or otherwise interact with your slides.
After all, since there won't be a presenter, you don't want to include presenter controls and risk someone
wandering by and fiddling with them.
But what no presenter controls also means is that if you set up your slideshow to run in kiosk mode, you
must set automatic timings so your slideshow plays automatically all the way through before looping around
again.
To set up your slideshow to run in kiosk mode:
1. Choose Slide Show →Set Up →Set Up Slide Show.
The Set Up Show dialog box appears.
2. Turn on the radio button next to "Browsed at a kiosk (full screen)."
Typically, you'll save kiosk-mode slide shows as self-running PowerPoint shows .
Tip: Pressing Esc stops a slideshow running in kiosk mode, so if you're setting up a kiosk slideshow to run
automatically and want to prevent folks from inadvertently stopping it in its tracks the second you turn your
back, make sure you hide the keyboard.
Hiding Individual Slides
First, make sure your slideshow includes all the slides you want to show and none that you don't. To
eliminate a slide from a particular slideshow, you don't have to delete it from the presentation you can
choose to hide it temporarily. That way, you can always take it out of hiding when you want to use it again.
To hide a slide:
1. In the Slides pane in Normal view, select the slide (or slides) you want to hide.
If you don't see thumbnails of your slides on the left side of your screen, choose View →Presentation
Views →Normal to restore the Slides pane.
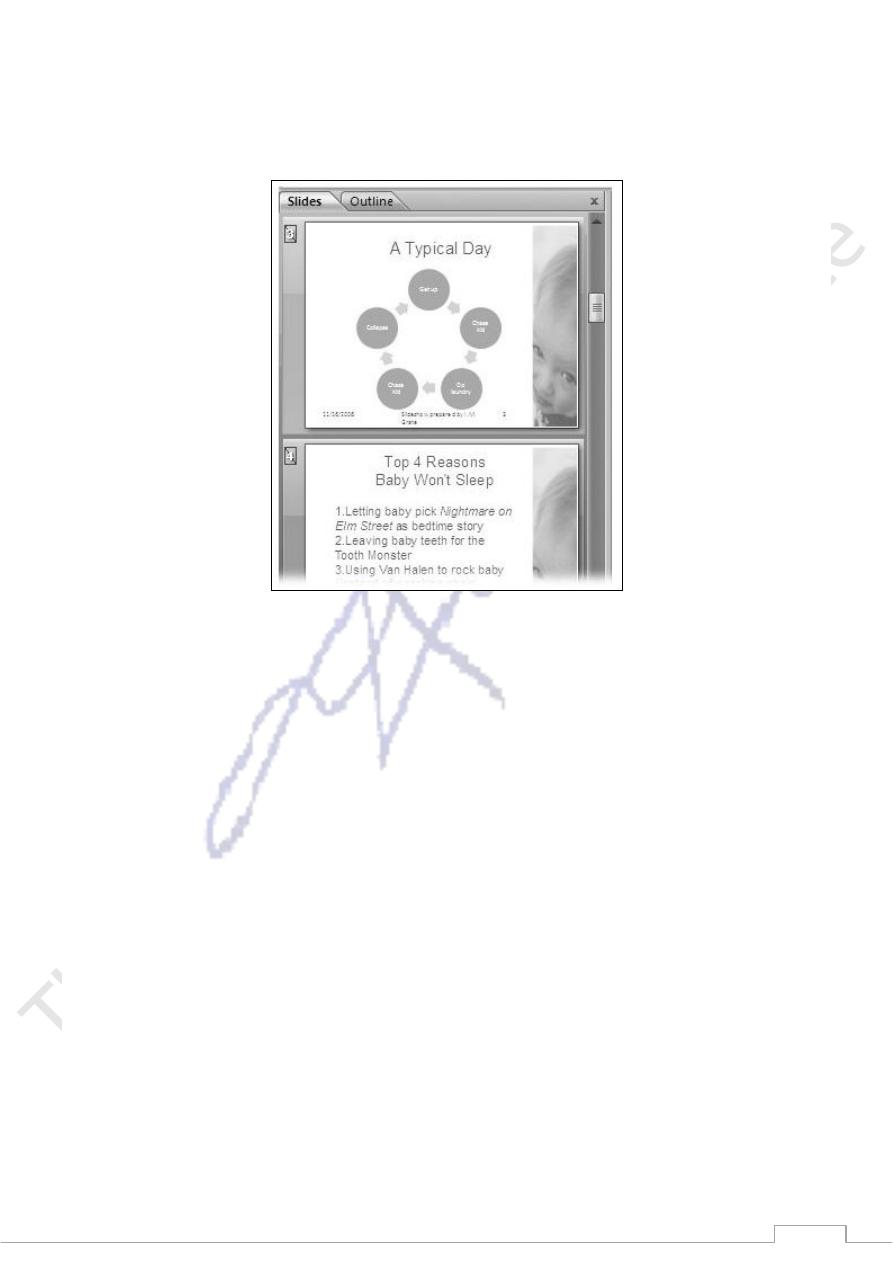
81
2. Click Slide Show →Set Up →Hide Slide.
In the Slides pane, the number of your newly hidden slide appears with a line through it (Figure 5).
3. The next time your presentation runs, PowerPoint skips the hidden slide(s).
Figure 5
Setting Up Automatic Timing
You've got two choices when it comes to clicking through your slides at show time: you can click through
each slide manually, or you can set up an automatic slideshow by telling PowerPoint when to go from one
slide to the next. An automatic slideshow is useful if, for example, you're delivering your presentation on a
kiosk, or if you have exactly 40 minutes to give your presentation and need PowerPoint to keep you on
track. Also, if you've done a presentation many times, you may be able to give your spiel and let PowerPoint
change the slides automatically, at just the right moment.
The key to setting up an automatic slideshow is to rehearse your presentation. You run through it just as you
would in front of a live audience, while PowerPoint's virtual stop watch keeps track of how many seconds
you spend on each slide. Then, if you're satisfied with the pacing, you tell PowerPoint to keep those timings.
To rehearse your presentation and set timings:
1. Click Slide Show
→
Set Up
→
Rehearse Timings.
PowerPoint begins a full-screen version of your slideshow and displays the Rehearsal toolbar (Figure
5).
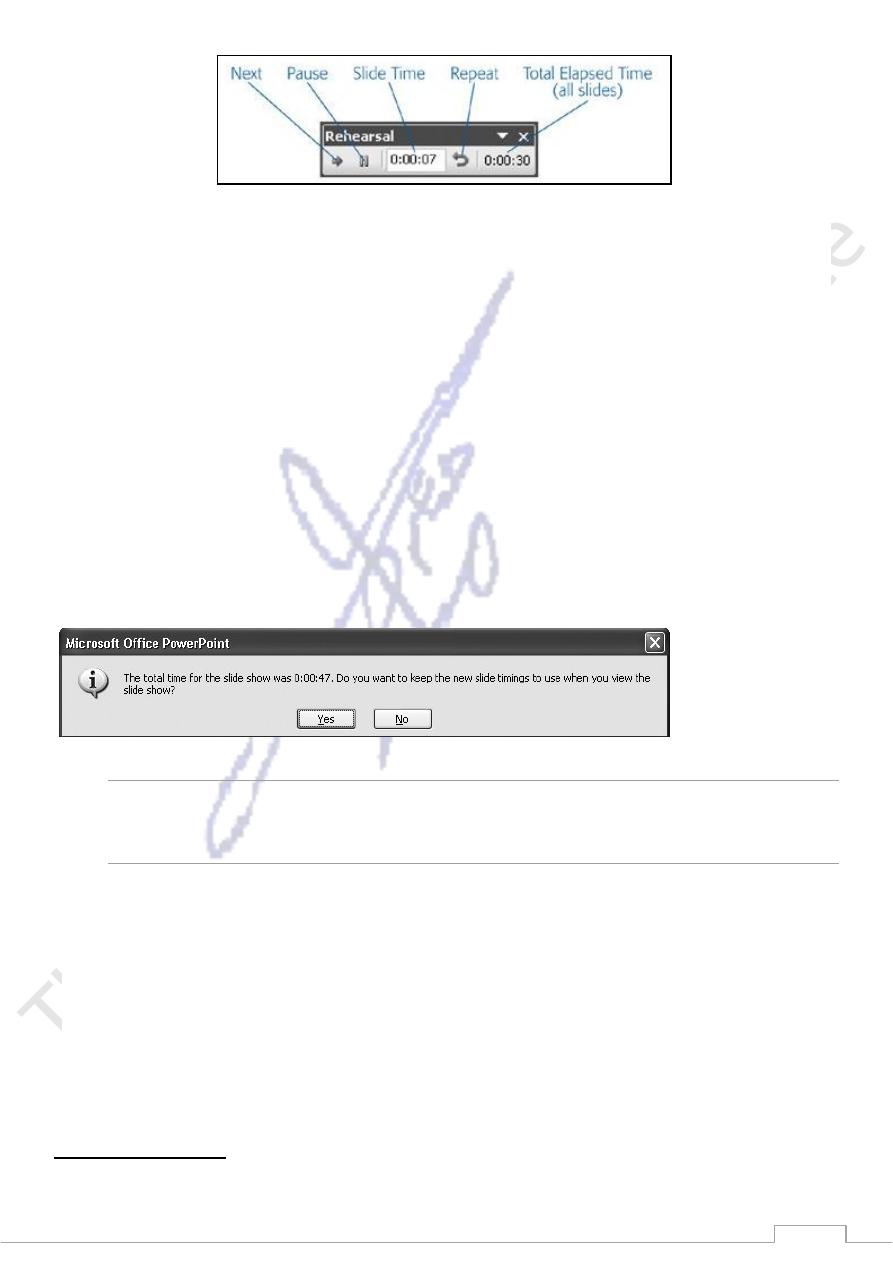
81
Figure 5
1. Step through your presentation as you normally would, speaking aloud and gesturing to a pretend
audience.
Hopping around slides in your slideshow affects your rehearsal timings. For example, clicking
Repeat to back up to an earlier slide stops the overall slideshow clock, which doesn't start up again
until you return to (or pass) the slide you were on when you clicked Repeat.
Typing the number of a particular slide and then pressing Enter to hop directly to that slide resets the
current slide clock even if you've already timed that slide; meanwhile, the overall slideshow clock
keeps on ticking away.
If the phone rings, the dog barks, your boss steps in, or you're otherwise interrupted, head to the
Rehearsal toolbar and click Pause to stop the clock. Then, after you've handled the interruption, click
Pause again to resume your rehearsal where you left off.
2. When you get to the last slide, take as long as you need to wrap up your presentation, and then press
Esc.
PowerPoint kicks up the dialog box you see in Figure 6.
Figure 6
1.
Tip: You can also press Esc at any time to abort the rehearsal.
2. Choose Yes if you want PowerPoint to flip through the slides at the pace you just rehearsed the next
time you run your slideshow. Choose No if you want to flip through your slides manually, or if
you've discovered during your rehearsal that you need to add or delete slides, rearrange your
slideshow, or come up with a lot more banter.
If you chose Yes, PowerPoint displays the Slide Sorter view showing your timings. (If you chose No,
PowerPoint simply returns you to Normal view.)
3. On the Slide Show tab, make sure Use Rehearsed Timings checkbox is turned on.
The next time you start your slideshow, PowerPoint uses your rehearsed timings to click through
your slides automatically.
Looping Continuously

82
Whether you choose to click through each slide yourself or use automatic timings to tell PowerPoint how
fast to move through each slide, you usually want to stop the slideshow after the last slide. But for those
times when you do want your slideshow to loop continuously (to begin the slideshow over again the instant
it finishes), you can do that by clicking Slide Show
→
Set Up
→
Set Up Slide Show to open the Set Up Show
dialog box. Then, in the Show Options section, turn on the "Loop continuously until 'Esc'" checkbox. When
you take down the show at the end of the day, just press the Esc key to stop the show and regain control of
your laptop.
Note: If you set up your slideshow to run in kiosk mode you don't have to tell PowerPoint to loop
continuously it assumes that's what you want. In fact, PowerPoint deactivates the "Loop continuously until
'Esc'" option.
Changing Background Color
In most cases, you won't want to change the background color of your slides. Instead, you'll rely on the
professionally designed themes that ship with PowerPoint (and that you can find for free or purchase on the
Web), which coordinate text and background color and effects into an aesthetically pleasing package.
Of course, there's an exception or two to every rule. In the case of background color, one exception to the
don't-change-it rule is when you need to match your presentation to a specific (non-PowerPoint) corporate or
organizational palette, such as the one your Marketing department uses for brochures and four-color ads.
Another exception is if you've monkeyed with your font color as described on page 90. Because the human
eye sees color in a relative context, black text (for example) appears different depending on whether you set
it against a white background, a pink background, or a dark blue background. So when you change the color
of your text, you may want to adjust the background color of your slide, too, until you find a combination
that looks good to you.
To change the background color of one, some, or all of the slides in a presentation:
1. In the Slides pane (see Figure 7), Ctrl-click to select the slides you want to change.
You can skip this step if you want to change the background of the currently selected slide only. To
select all of the slides in a presentation press Ctrl+A.
Figure 7),
2. Choose Design →Background Styles.
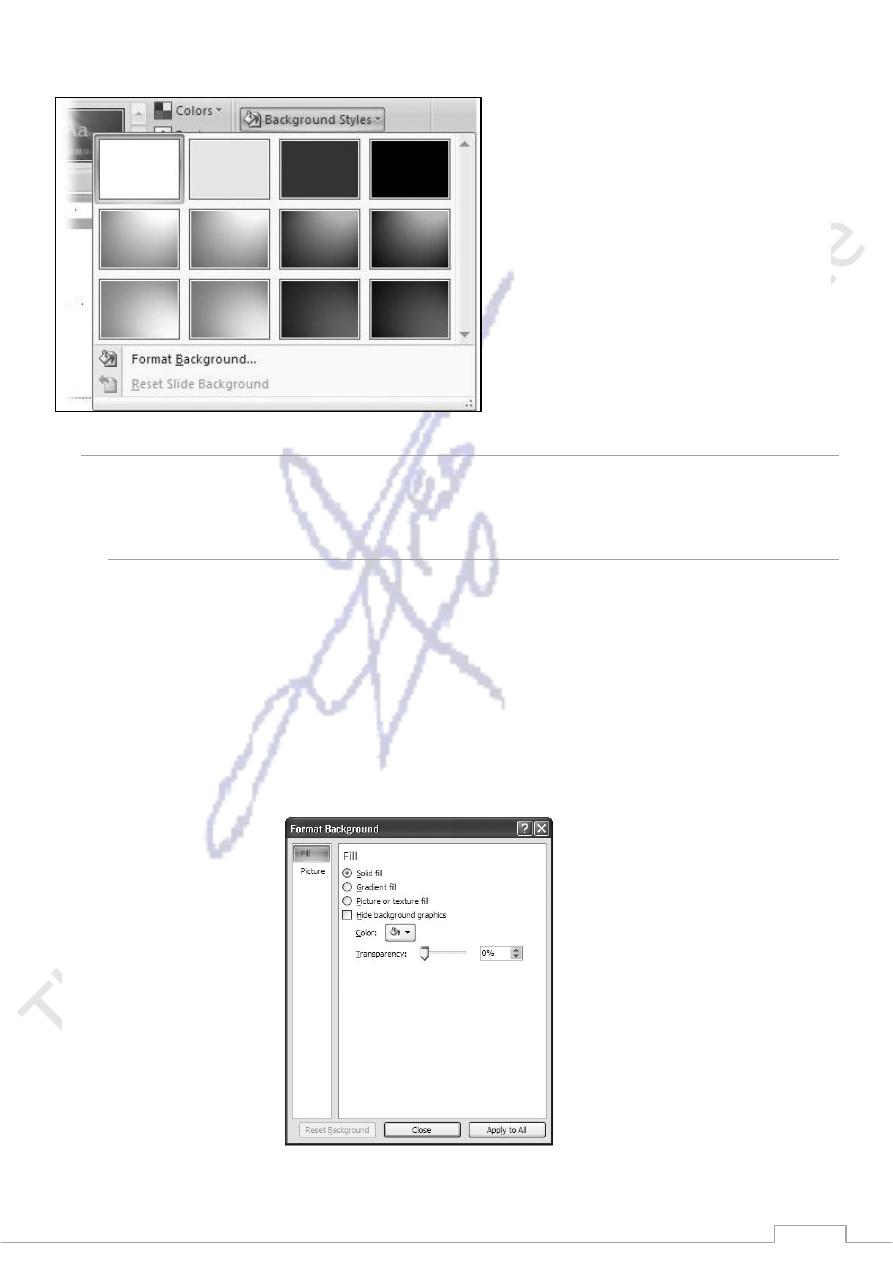
83
A gallery of background color options, complete with cool gradient effects, appears (Figure 8).
Figure 8
Note: Another way to see basic background options is to right-click a blank spot on your slide and
then, from the menu that appears, choose Background Styles.
3. From the gallery, click to choose an option.
The gallery disappears, and PowerPoint applies the new color-and-gradient background to all the
currently selected slides.
If you don't see a color option you like in the gallery, you can choose from a broader selection:
1. In the Background Styles gallery, choose Format Background.
The Format Background dialog box opens.
2. On the Fill tab, turn on the radio button next to "Solid fill."
The options you see in Figure 9 appear.
Figure 9
84
3. Click the Color drop-down box to display a color picker, from which you can choose the color you
want.
In most cases, you should stick with a color in the Themes Colors section, so that your background
color coordinates with the theme you've applied to your presentation.
4. If you want to vary the tint of your color, drag the transparency slider. You can also change the
percentage in the Transparency box.
Whether you drag the transparency slider or use the transparency box, PowerPoint automatically
previews the transparency effect on the slide.
5. When you're satisfied with the color and transparency you've chosen, click Close (to dismiss the
Format Background dialog box and apply your new background to the currently selected slides) or
Apply to All (to dismiss the Format Background dialog box and apply your new background to every
slide in your presentation).
Adding a Gradient Effect
A solid colored background, like the ones you learned to apply in the previous section, sometimes do the
trick. But some folks think a gradient effect (Figure 10) looks a bit more sophisticated. Instead of a single
color, gradients blend multiple bands of color for mild to wild effects. All of the basic background options
that PowerPoint suggests (Figure 8) include gradients, but you can apply your own custom gradient effect
quickly and easily.
Figure 10
To apply a gradient effect to your background:
1. Choose Design Background Background Styles.
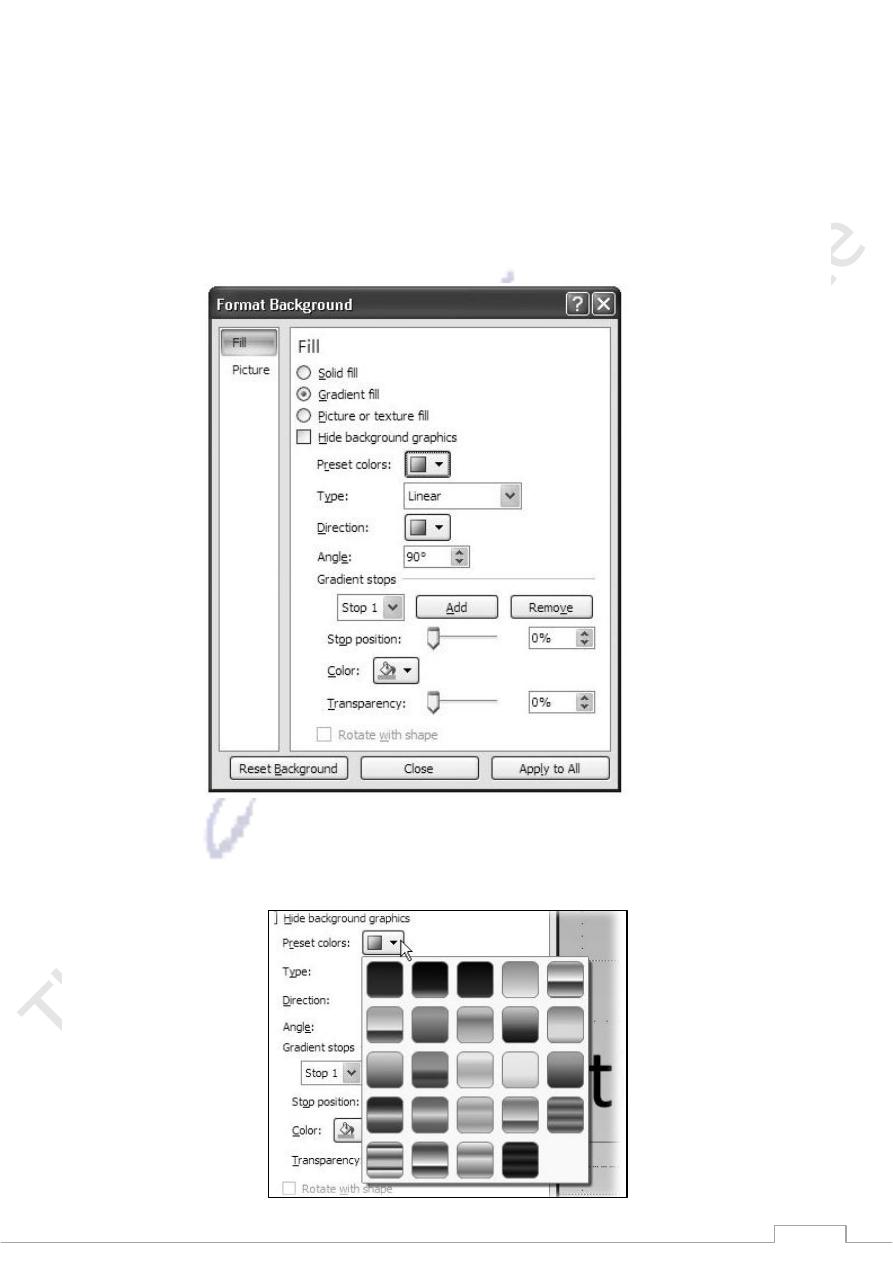
85
A gallery of background color options appears, complete with cool gradient effects.
2. In the gallery, choose Format Background.
The Format Background dialog box appears.
3. On the Fill tab, turn on the radio box next to "Gradient fill."
PowerPoint applies a basic fill to your slide, and the gradient-related options you see in Figure 11
appear.
Figure 11
4. Click the down arrow next to "Preset colors."
A gallery of preset gradient options appears (Figure 12).